Network Interfaces
Network interfaces are virtual network adapters attached to your server. Each interface is connected to a specific network and receives an IP address from its range. A security group can be applied to each interface to control inbound and outbound traffic.
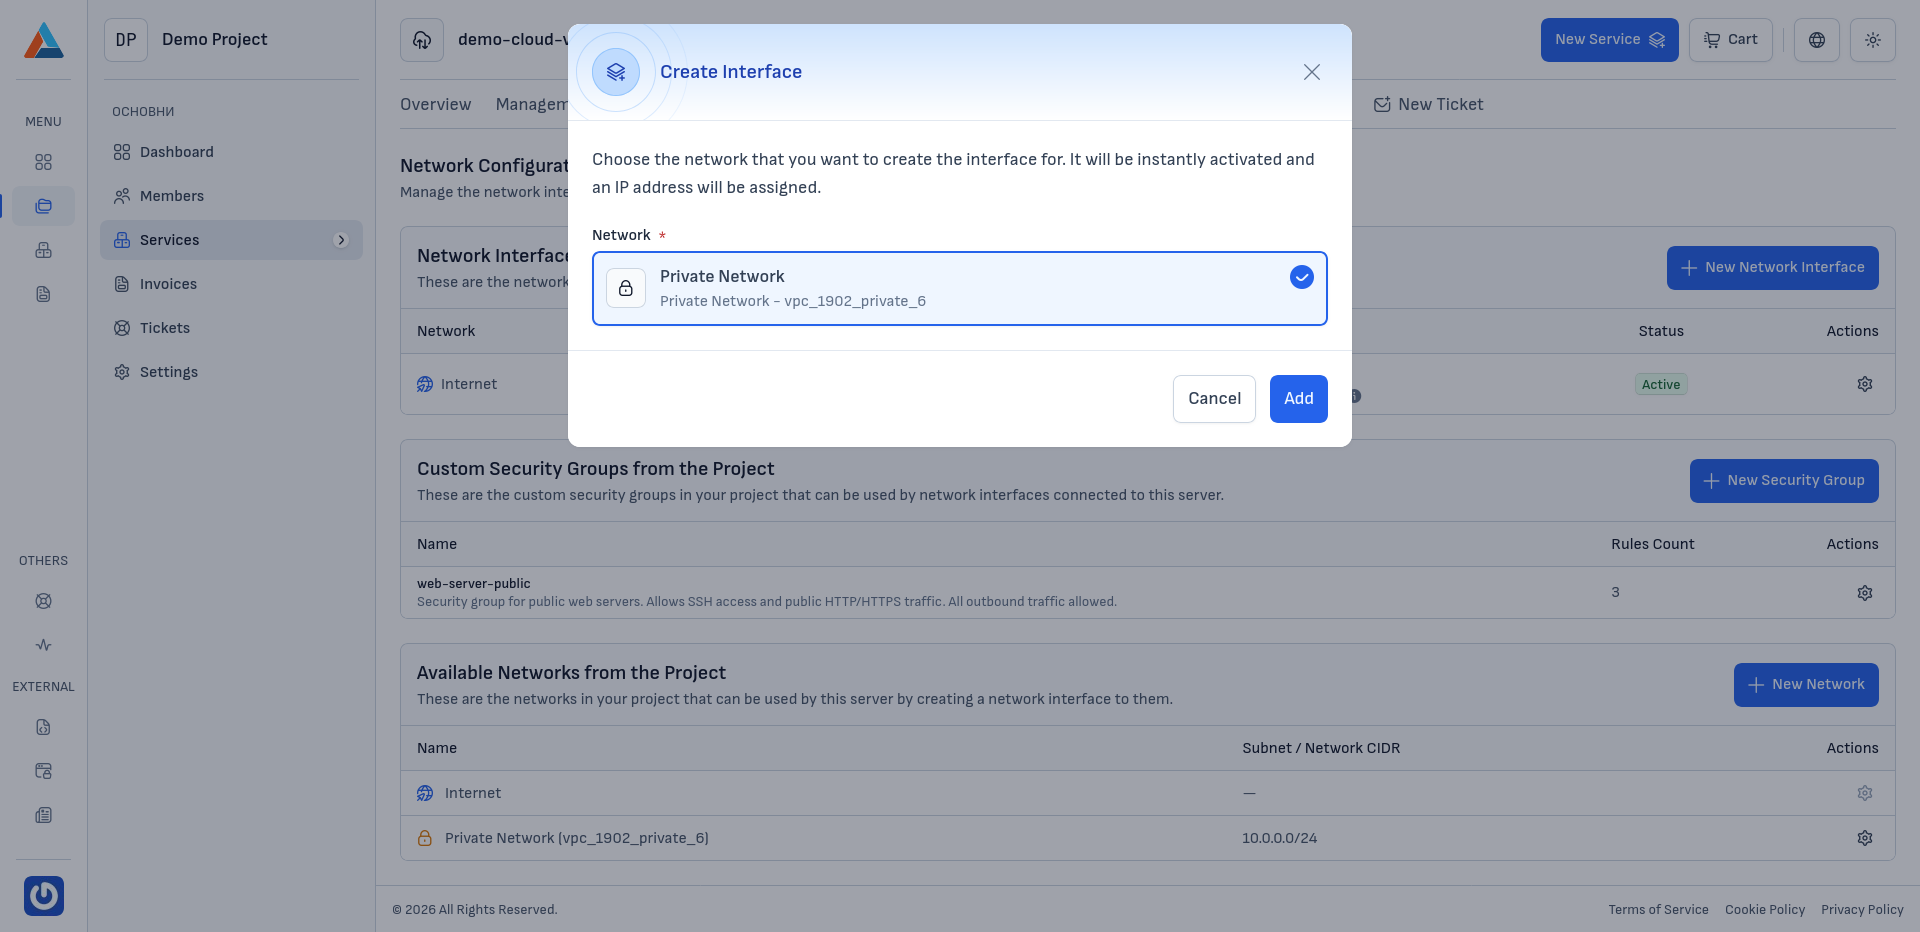
Creating a Network Interface
-
Navigate to the Section
Go to the "Network Configuration" section on the service page.
-
Open the Creation Dialog
In the "Network Interfaces" section, click the "+ New Network Interface" button to open the dialog.
-
Select a Network
Choose the network you want to connect the new interface to. The list includes all available networks in your project.
-
Confirm
Click the "Add" button to create the network interface.
Note
After creation, the interface will automatically receive an IP address from the selected network and will appear in the list of network interfaces.
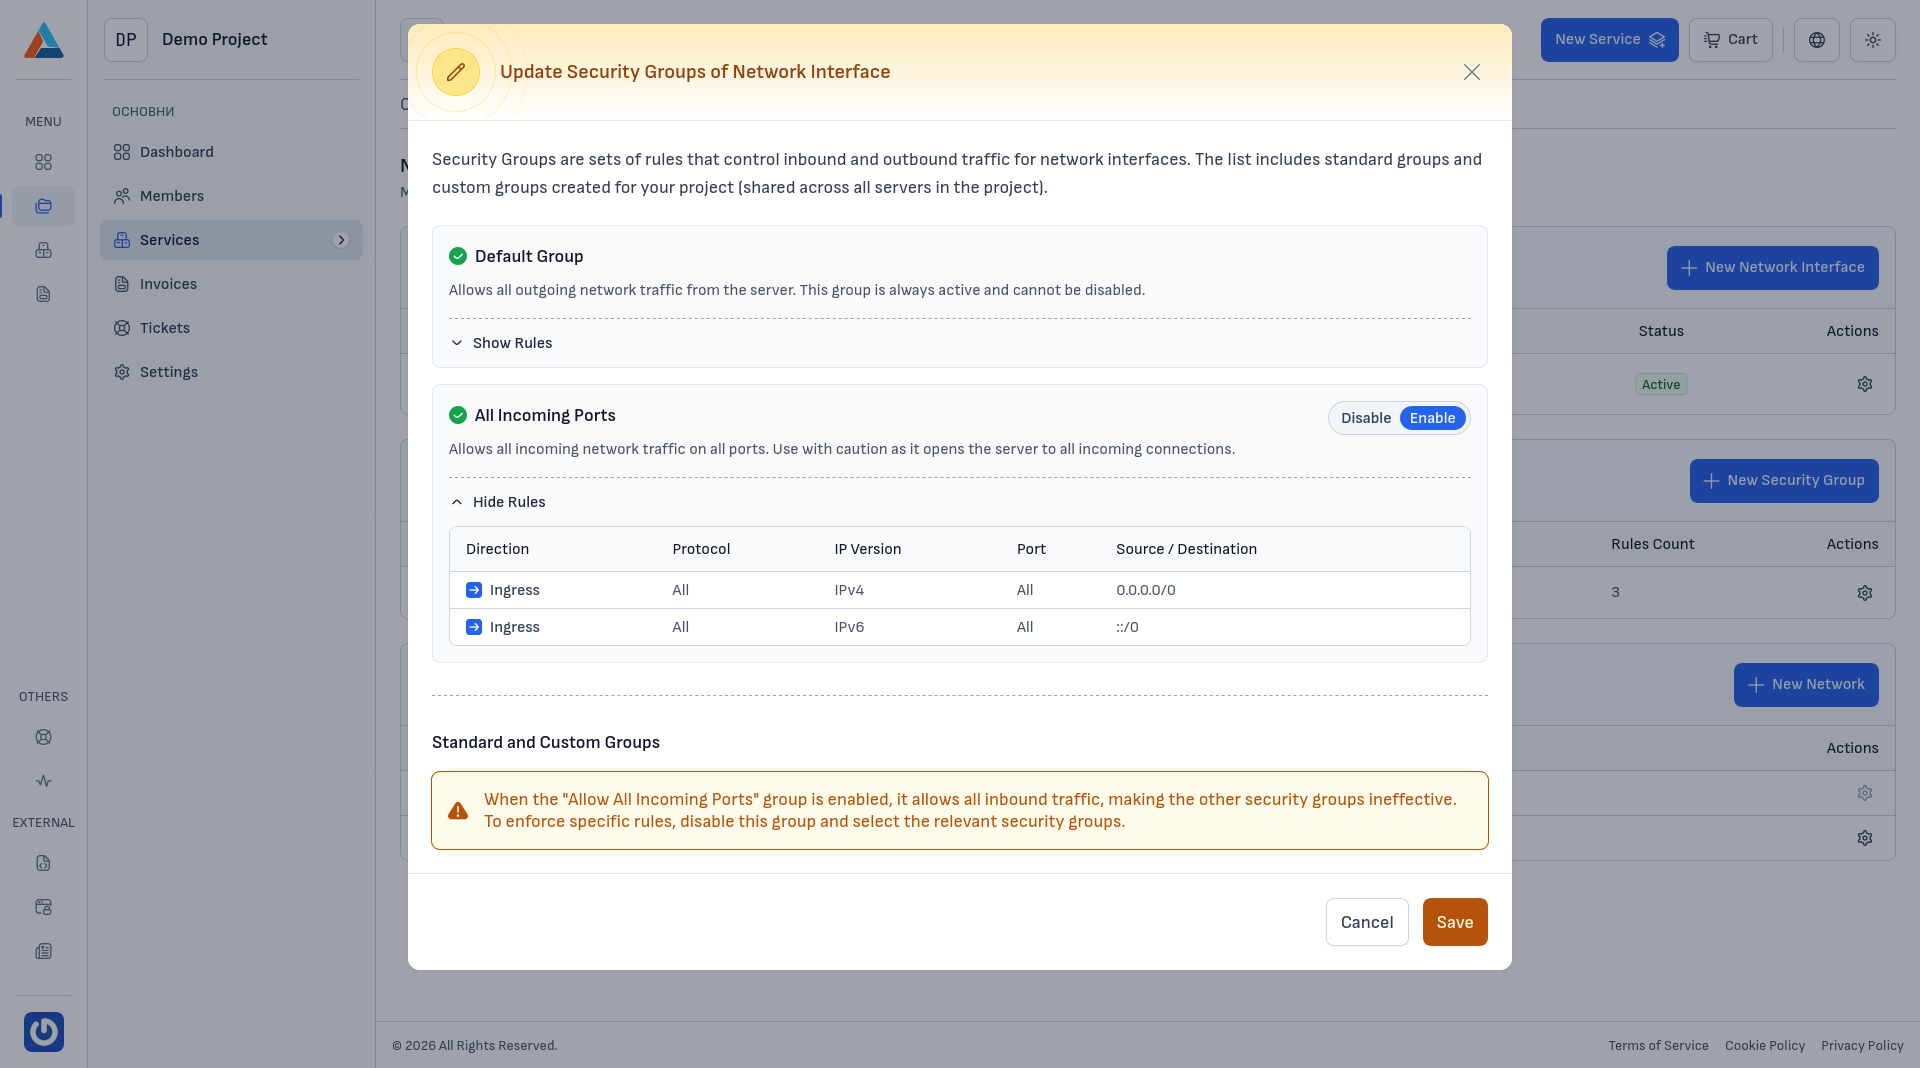
Editing a Security Group on an Interface
Each network interface can have an applied security group that determines what traffic is allowed. You can switch the security group or configure its rules.
-
Navigate to the Section
Go to the "Network Configuration" section on the service page.
-
Open the Security Settings
In the "Network Interfaces" section, click the edit button in the "Actions" column of the interface you want to edit, to open the security group editing dialog.
-
Select a Security Group
In the dialog, you can choose which security group to apply to the interface:
-
Default Group
The default group that comes automatically with the server. These rules are built-in and cannot be modified.
-
All Inbound Ports
Allows all inbound traffic on all ports. Use with caution, as this means the server is open to all incoming connections.
-
Custom Groups
Apply a custom group from your project with specific rules for inbound and outbound traffic.
-
-
Confirm
Click the "Save" button to apply the changes.
Note
Security group changes take effect immediately. When you select and enable the "All Inbound Ports" group, it allows all inbound traffic — make sure you intentionally want unrestricted access before activating it.
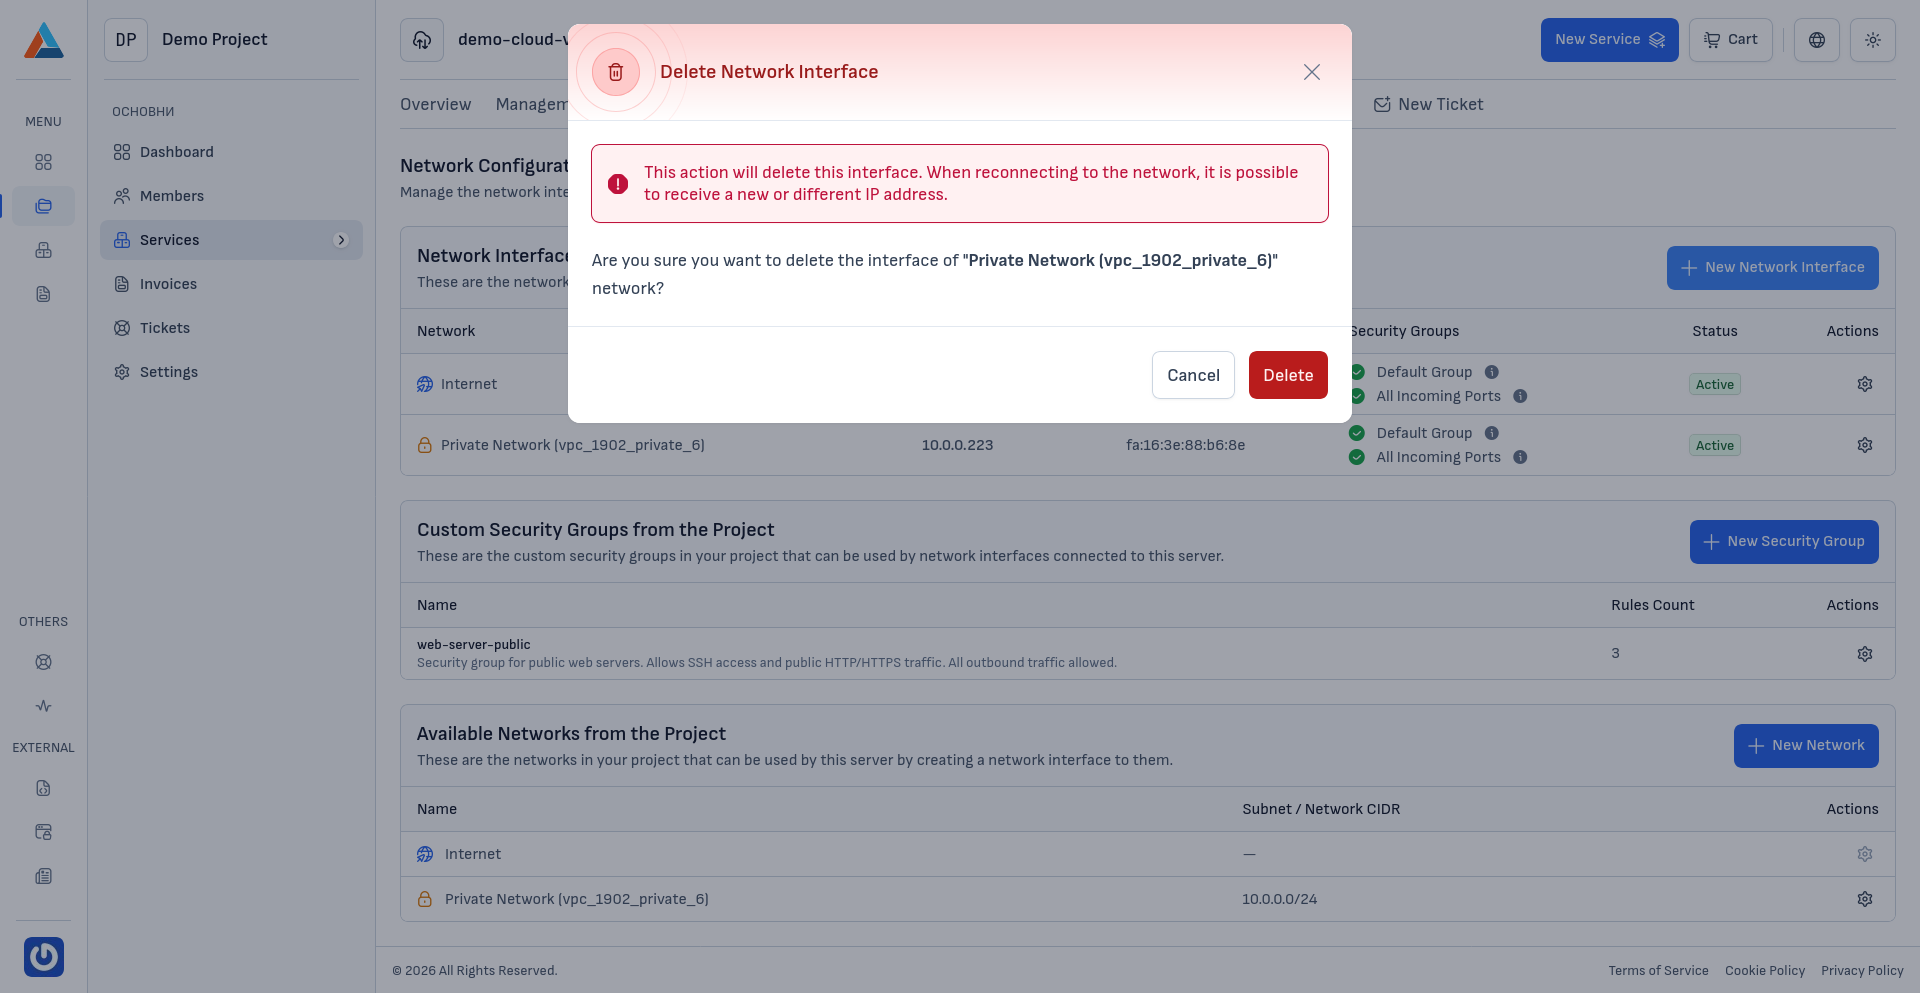
Deleting a Network Interface
-
Navigate to the Section
Go to the "Network Configuration" section on the service page.
-
Select an Interface to Delete
In the "Network Interfaces" section, click the delete button in the "Actions" column of the interface you want to remove, to open the confirmation dialog.
-
Confirm
Click the "Delete" button to confirm the action.
Warning
This action will delete the network interface. If needed, you will have to reconnect the network to the server and will receive a different IP address.