Security
The Security section (Settings → Security) contains two account protection controls — password change and multi-factor authentication (MFA).
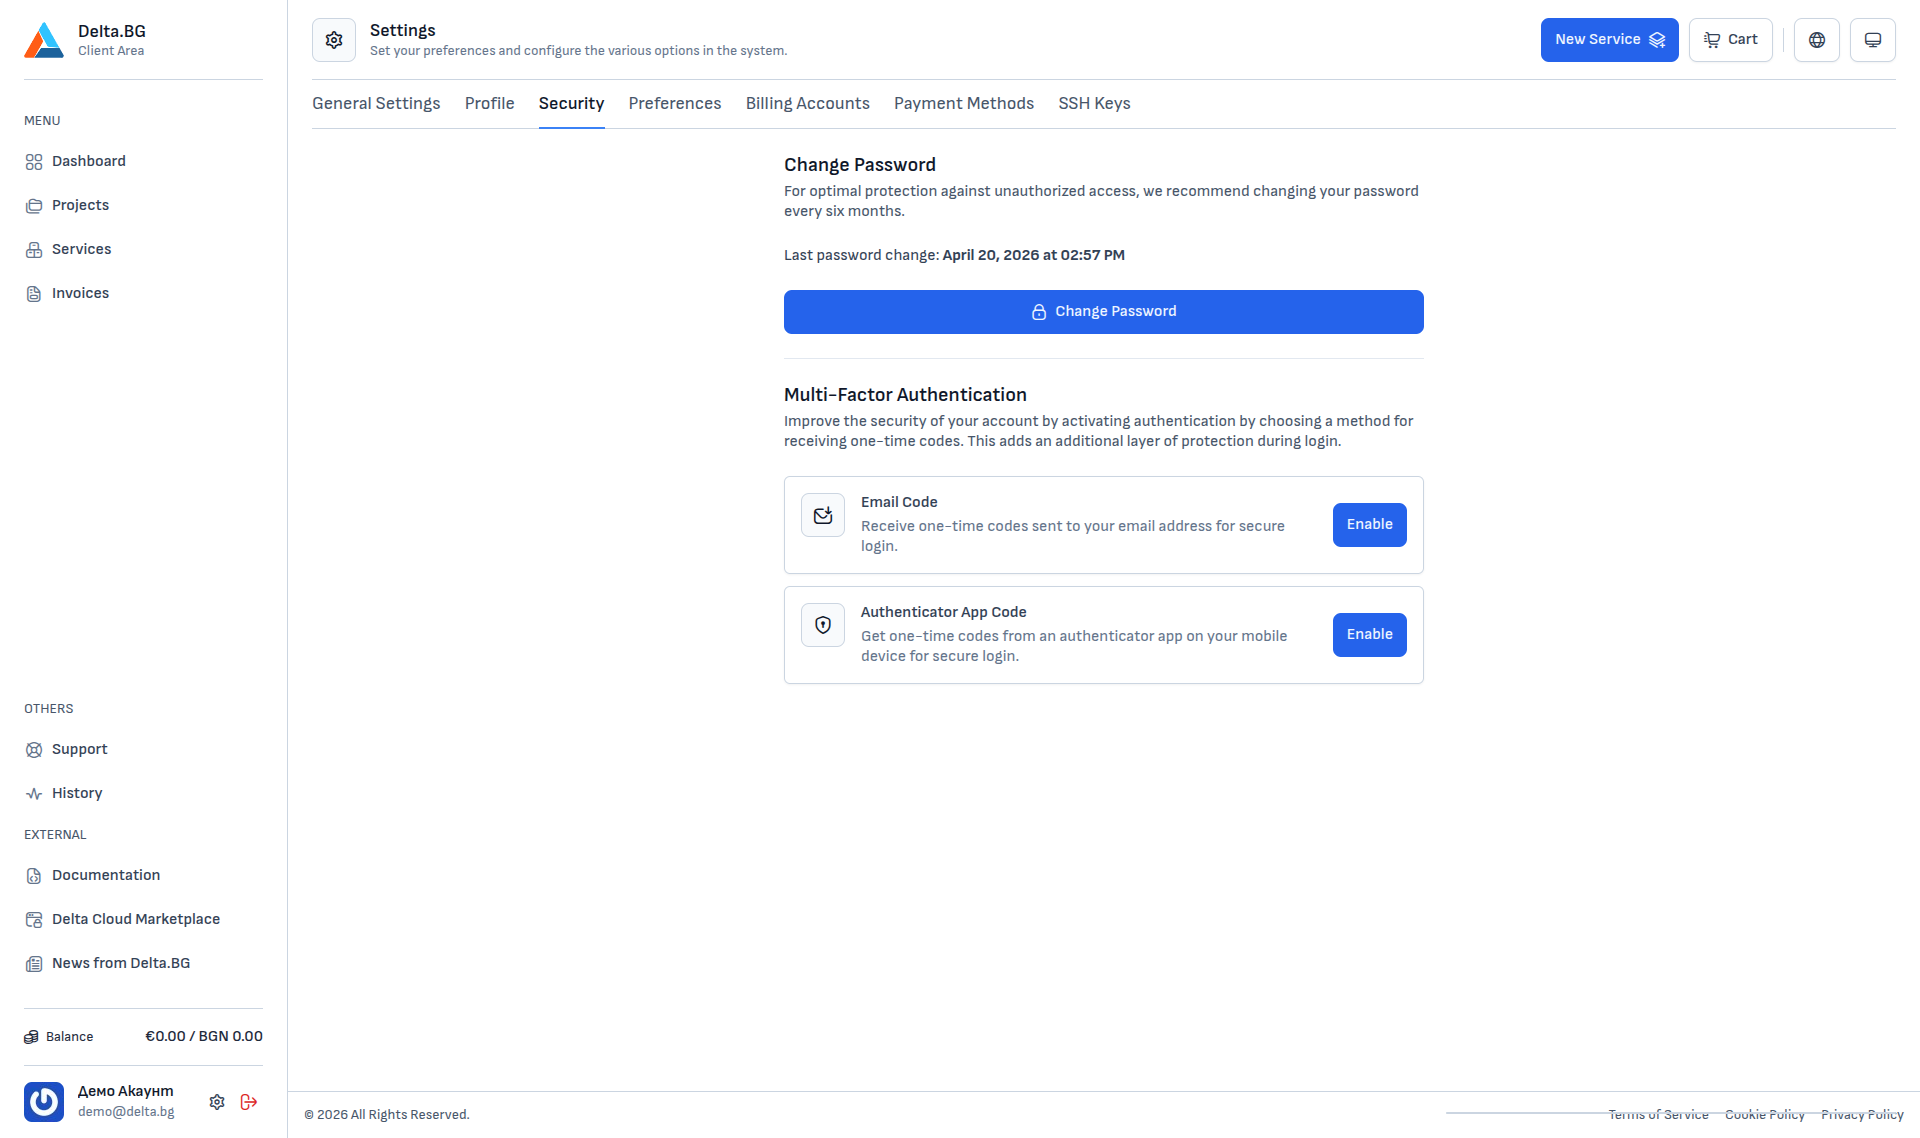
Change password
The recommended password rotation cadence is every six months. The date of the last change is shown above the Change Password button.
Pressing the button opens a dialog with three fields:
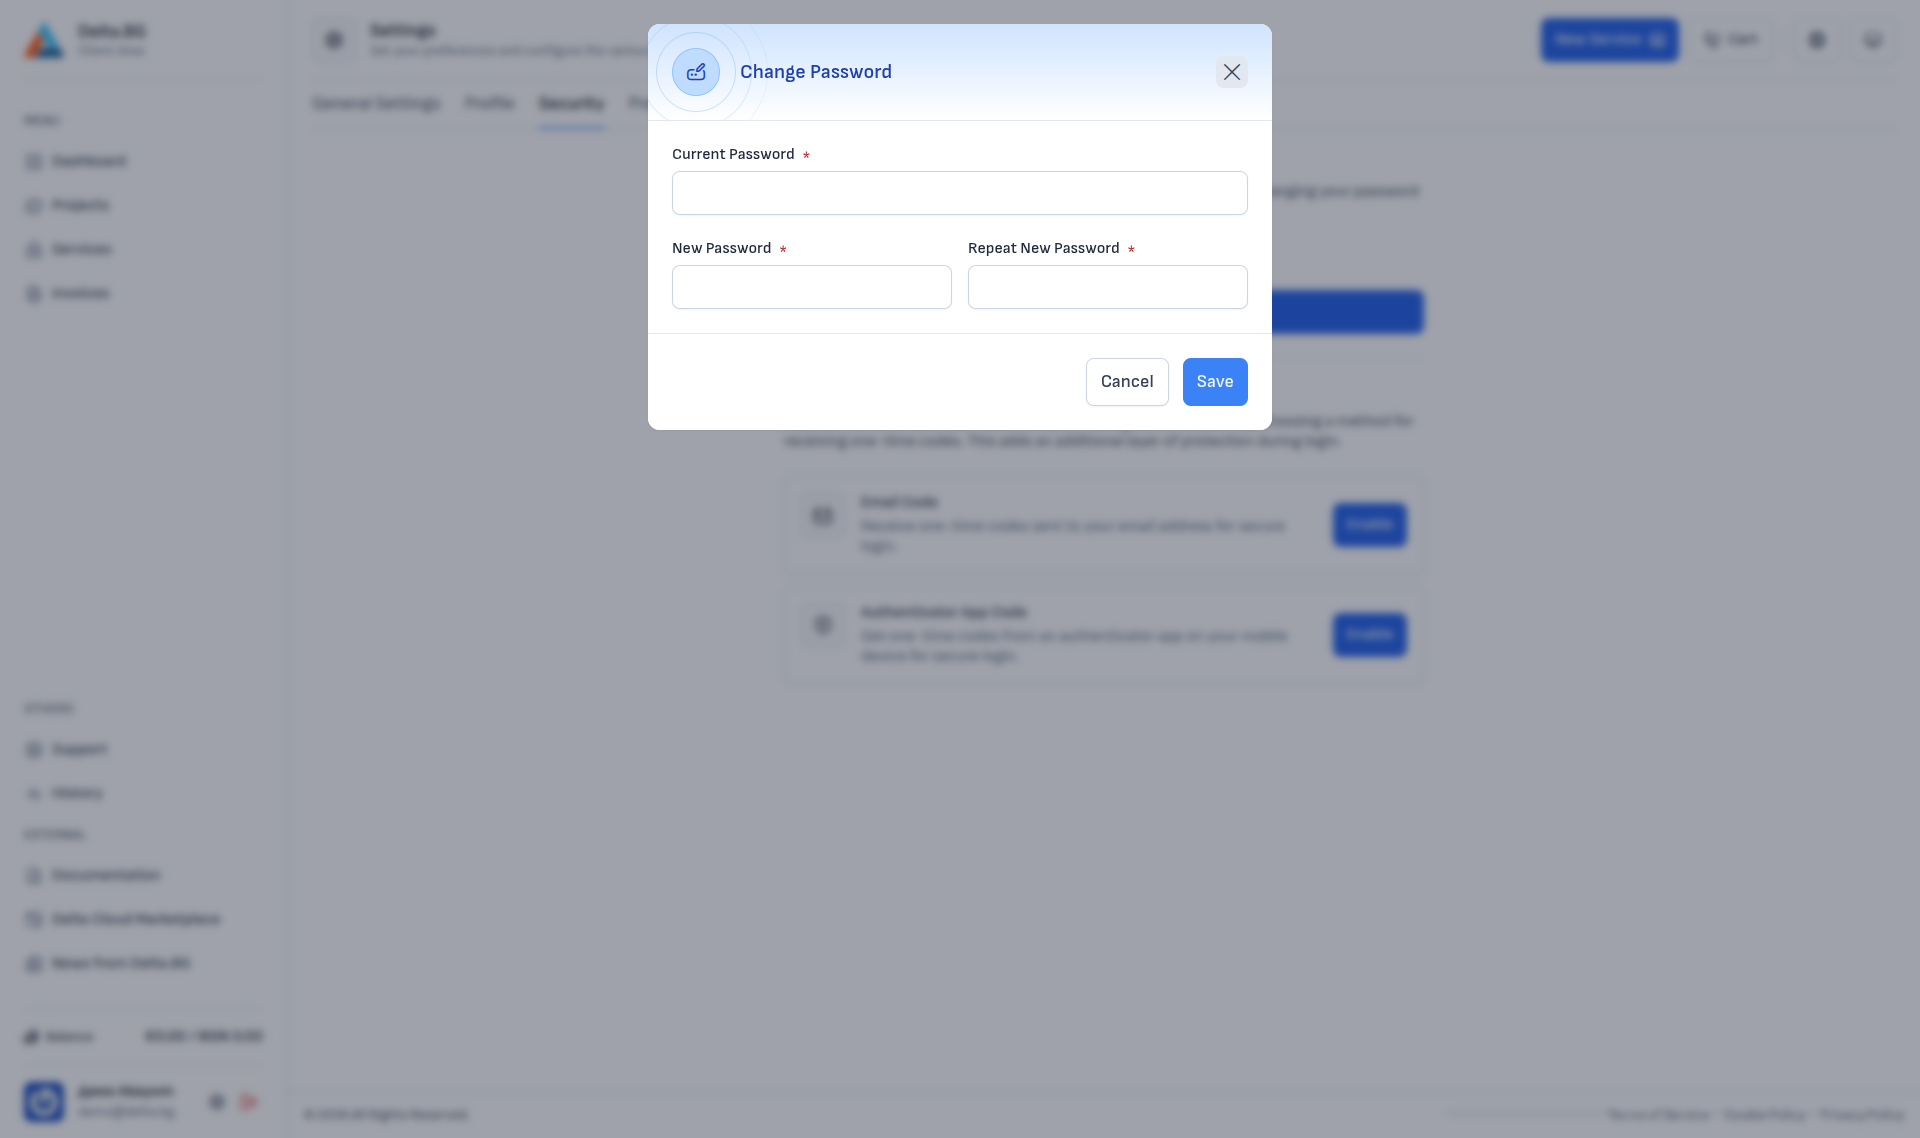
| Field | Description |
|---|---|
| Current Password | Your current customer-area password. |
| New Password | The new password. A minimum of 12 characters combining letters, digits and special characters is recommended. |
| Repeat New Password | Confirmation — must match New Password. |
Press Save to commit the change. After a successful change you will be signed out from every other device.
Multi-factor authentication (MFA)
Multi-factor authentication adds an extra layer of protection — at sign-in you will enter your password and a one-time code from a channel of your choice. This keeps the account safe even if the password leaks.
Two methods are supported:
-
Email code
One-time codes sent to the registered email address. Easiest to enable — requires no extra app.
-
Authenticator app code
One-time codes generated by an authenticator app (Google Authenticator, Authy, 1Password and similar).
Enabling Email code
Pressing Enable next to Email Code opens a dialog that first asks you to confirm your identity. If no other MFA method is active yet, the prompt is for your password; if Authenticator App Code is already active, the prompt is for a one-time code from the app instead:
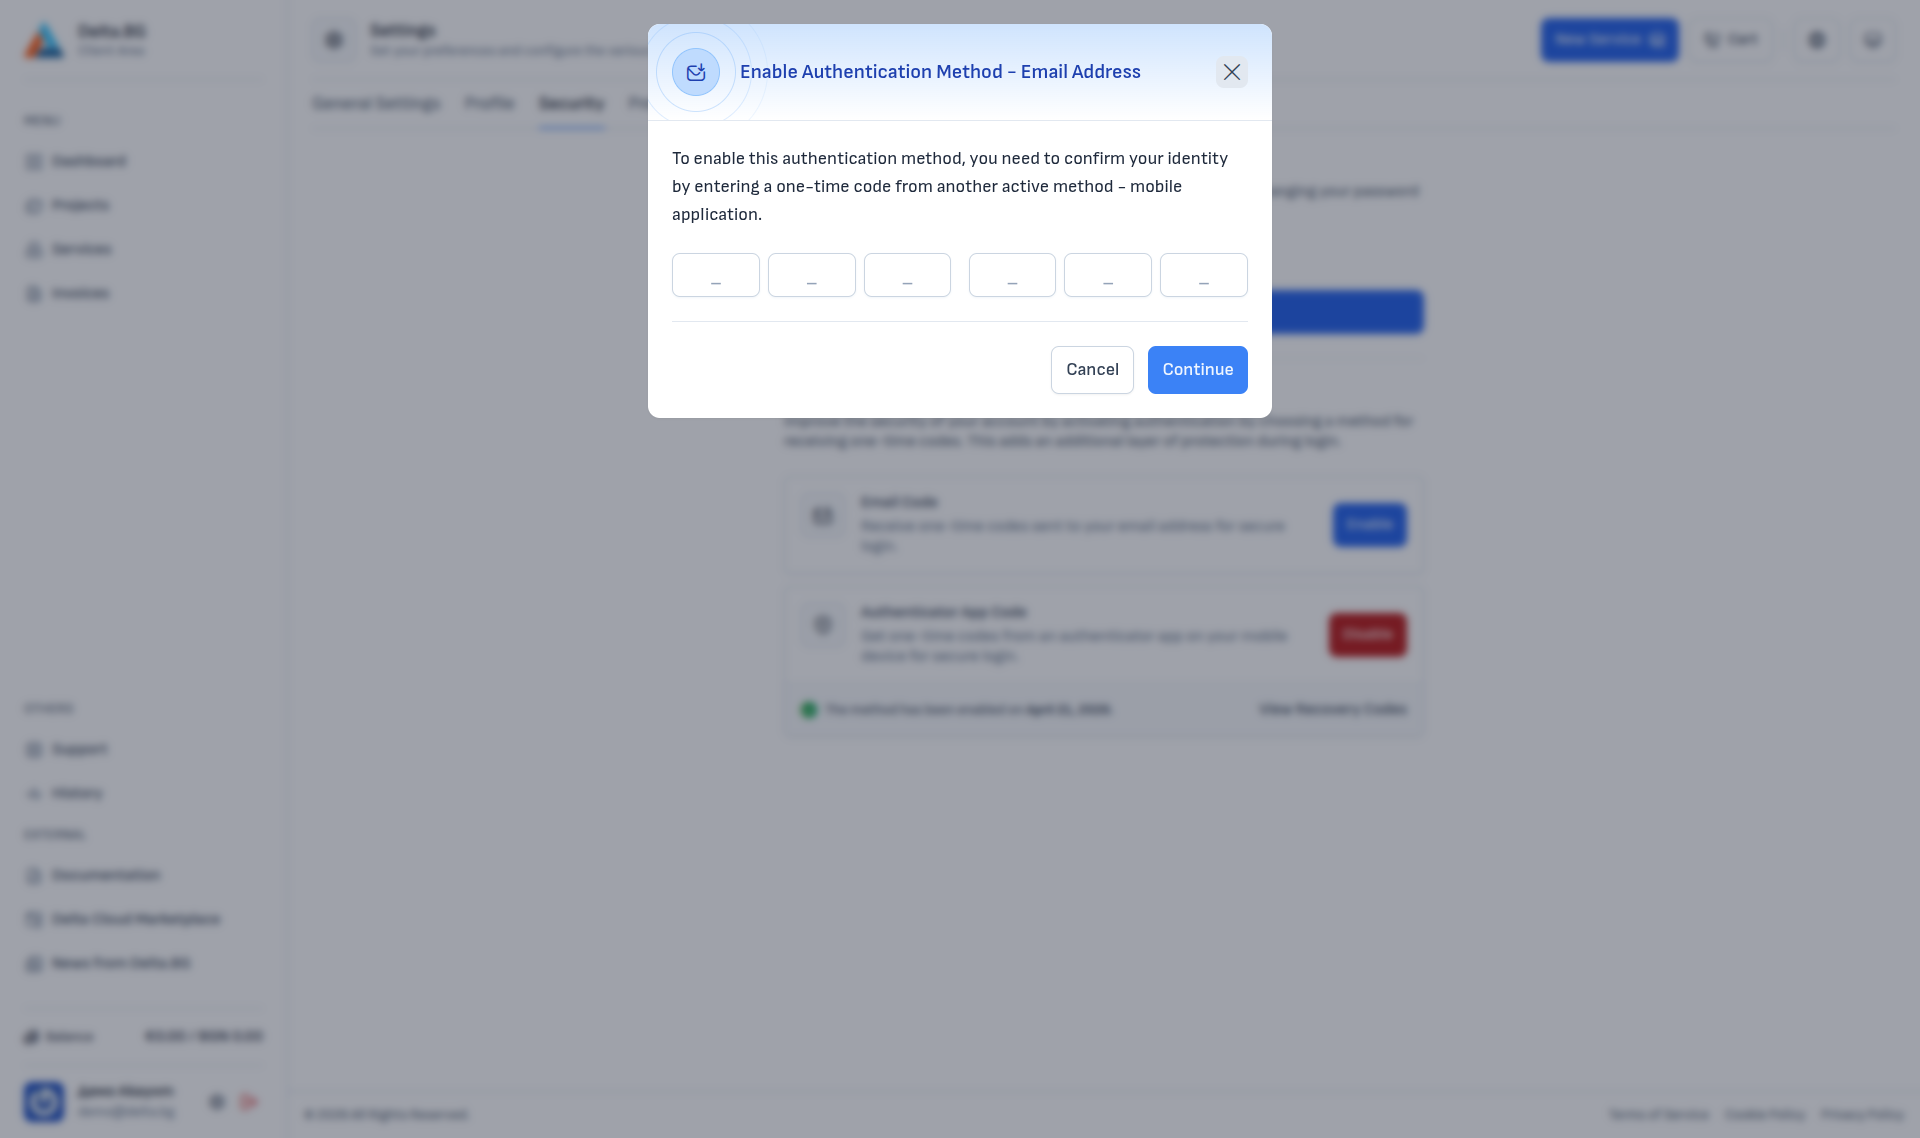
Press Continue and the system sends a one-time code to your registered email address — the dialog then shows a 6-digit input:

Enter the code from the email. If it does not arrive within a minute or two, press Request Code (unlocked after a 60-second countdown) to resend.
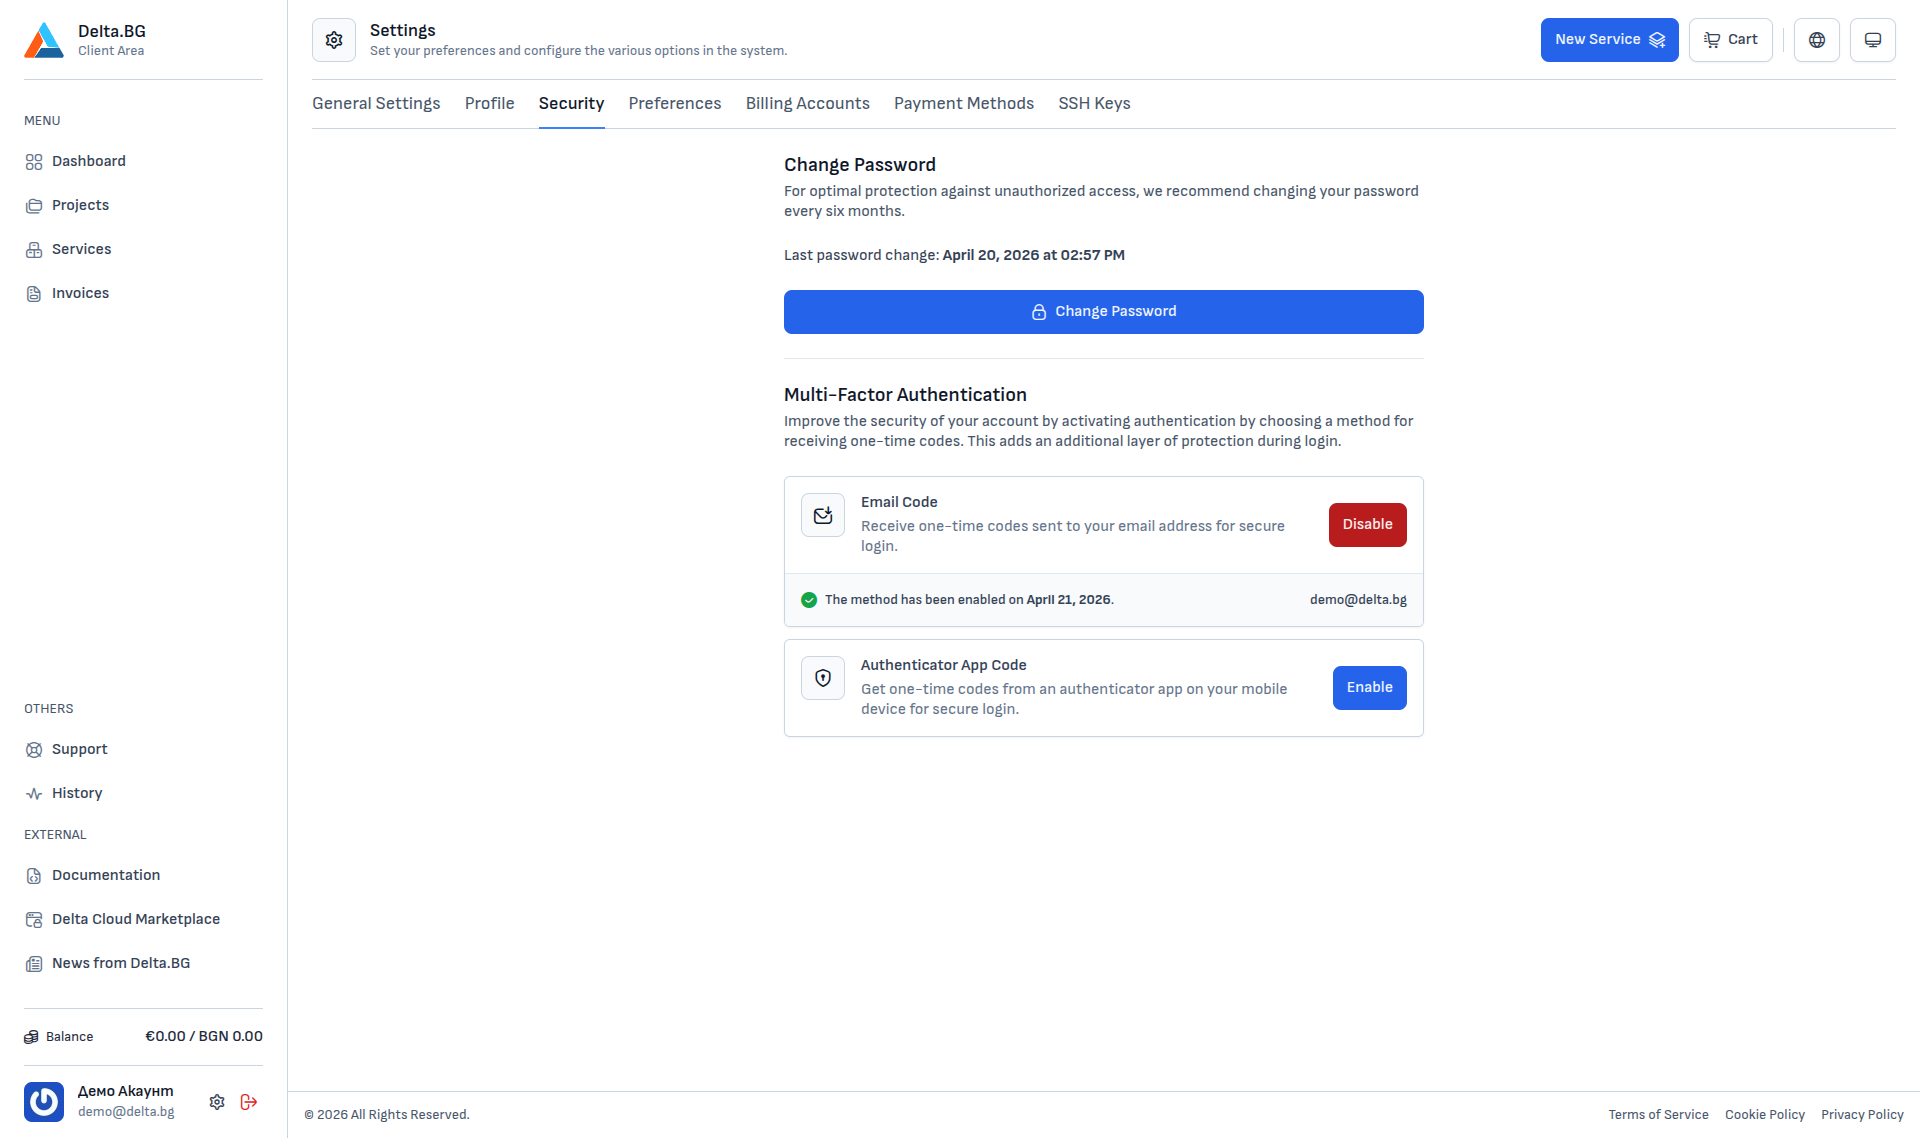
Once activated, the Security section shows the activation date and the email address codes are sent to. The Enable button is replaced with a red Disable:
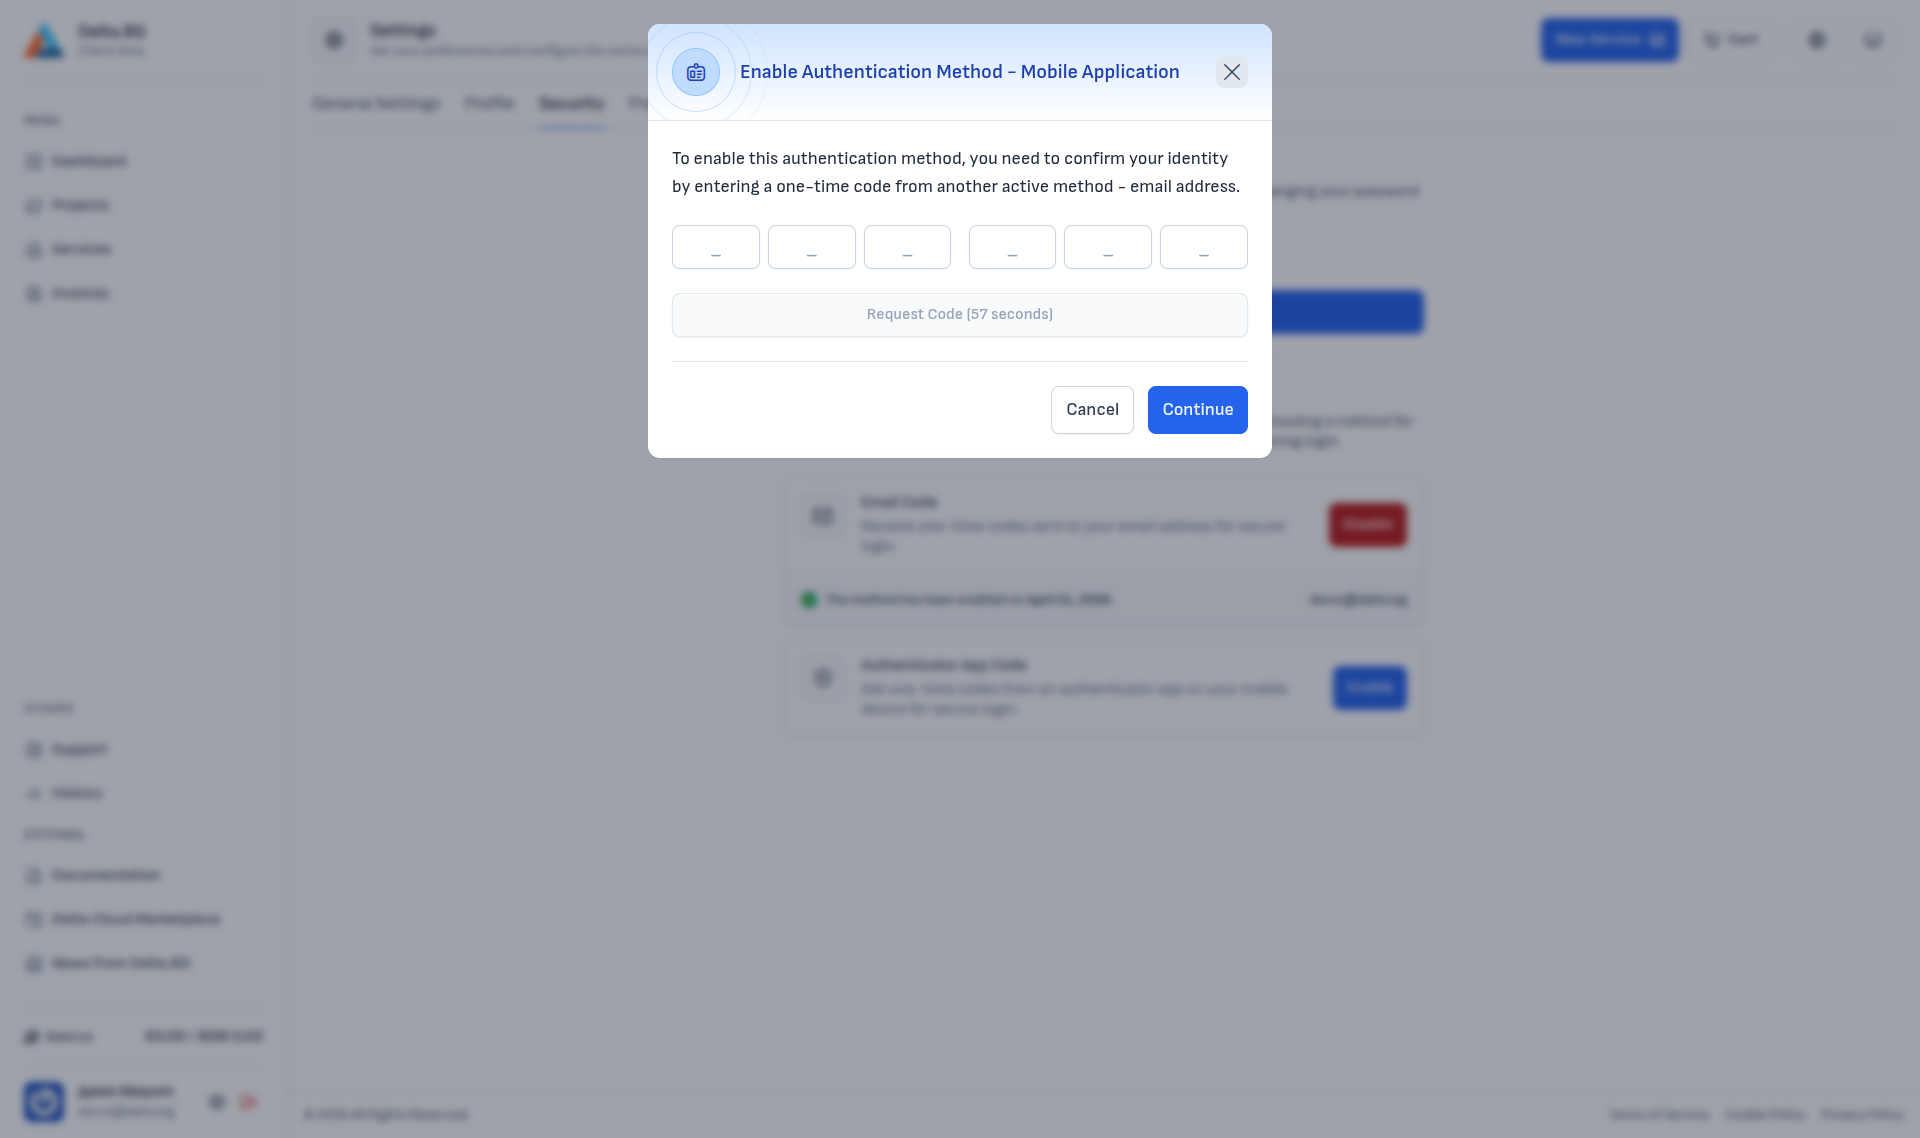
Enabling Authenticator app code
Enabling the Authenticator App Code method goes through four steps. If you already have Email Code active, the first step uses an email code for confirmation (otherwise it asks for your password).
Step 1 — Identity confirmation:
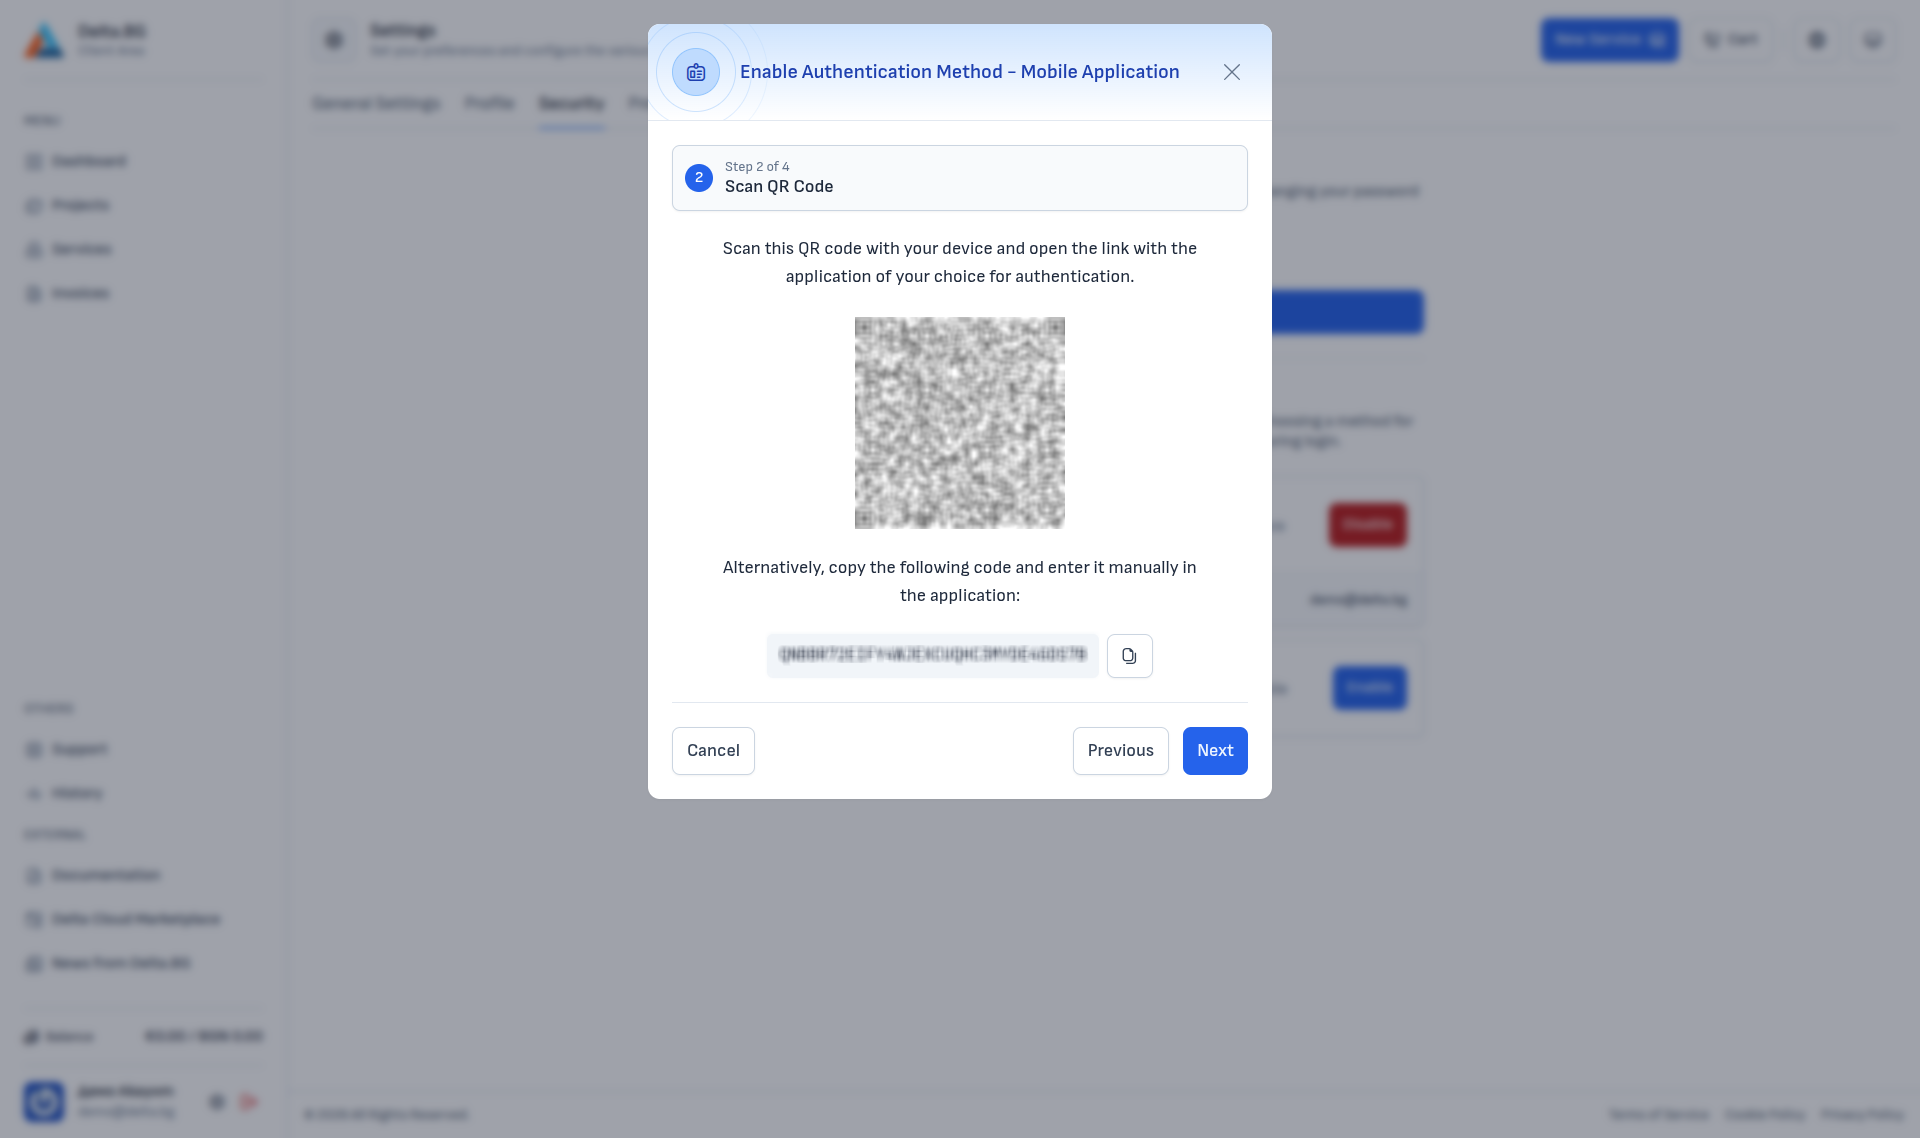
Step 2 — Scan the QR code:
Scan the QR code with your authenticator app (Google Authenticator, Authy, 1Password, Bitwarden and similar). If your app does not support scanning, copy the alphanumeric code shown below the QR and add it manually.
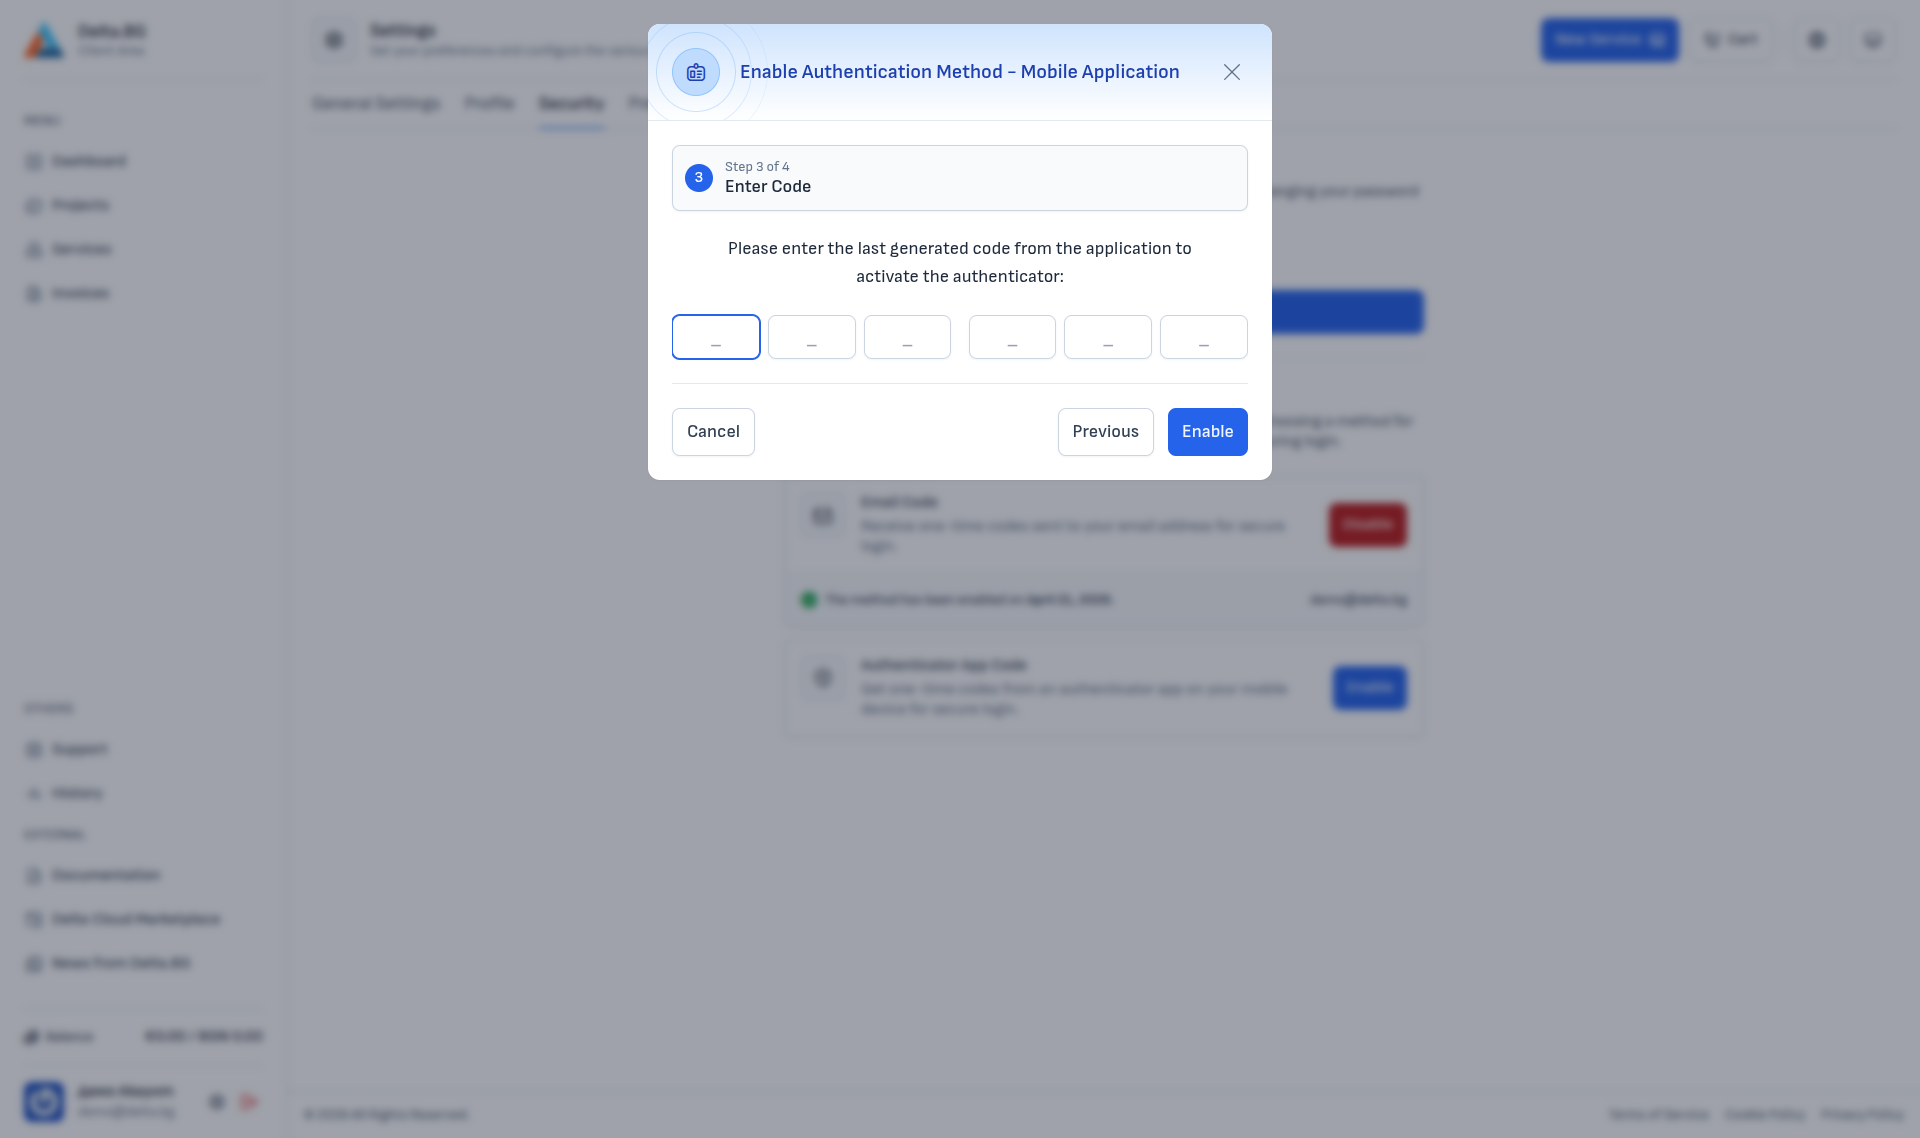
Step 3 — Enter a generated code:
After the app links the account it generates 6-digit codes every 30 seconds. Enter the current one:
Step 4 — Recovery codes:
On success the dialog shows 10 one-time recovery codes. Each code can be used only once and serves as a fallback sign-in method if you lose access to the authenticator app.
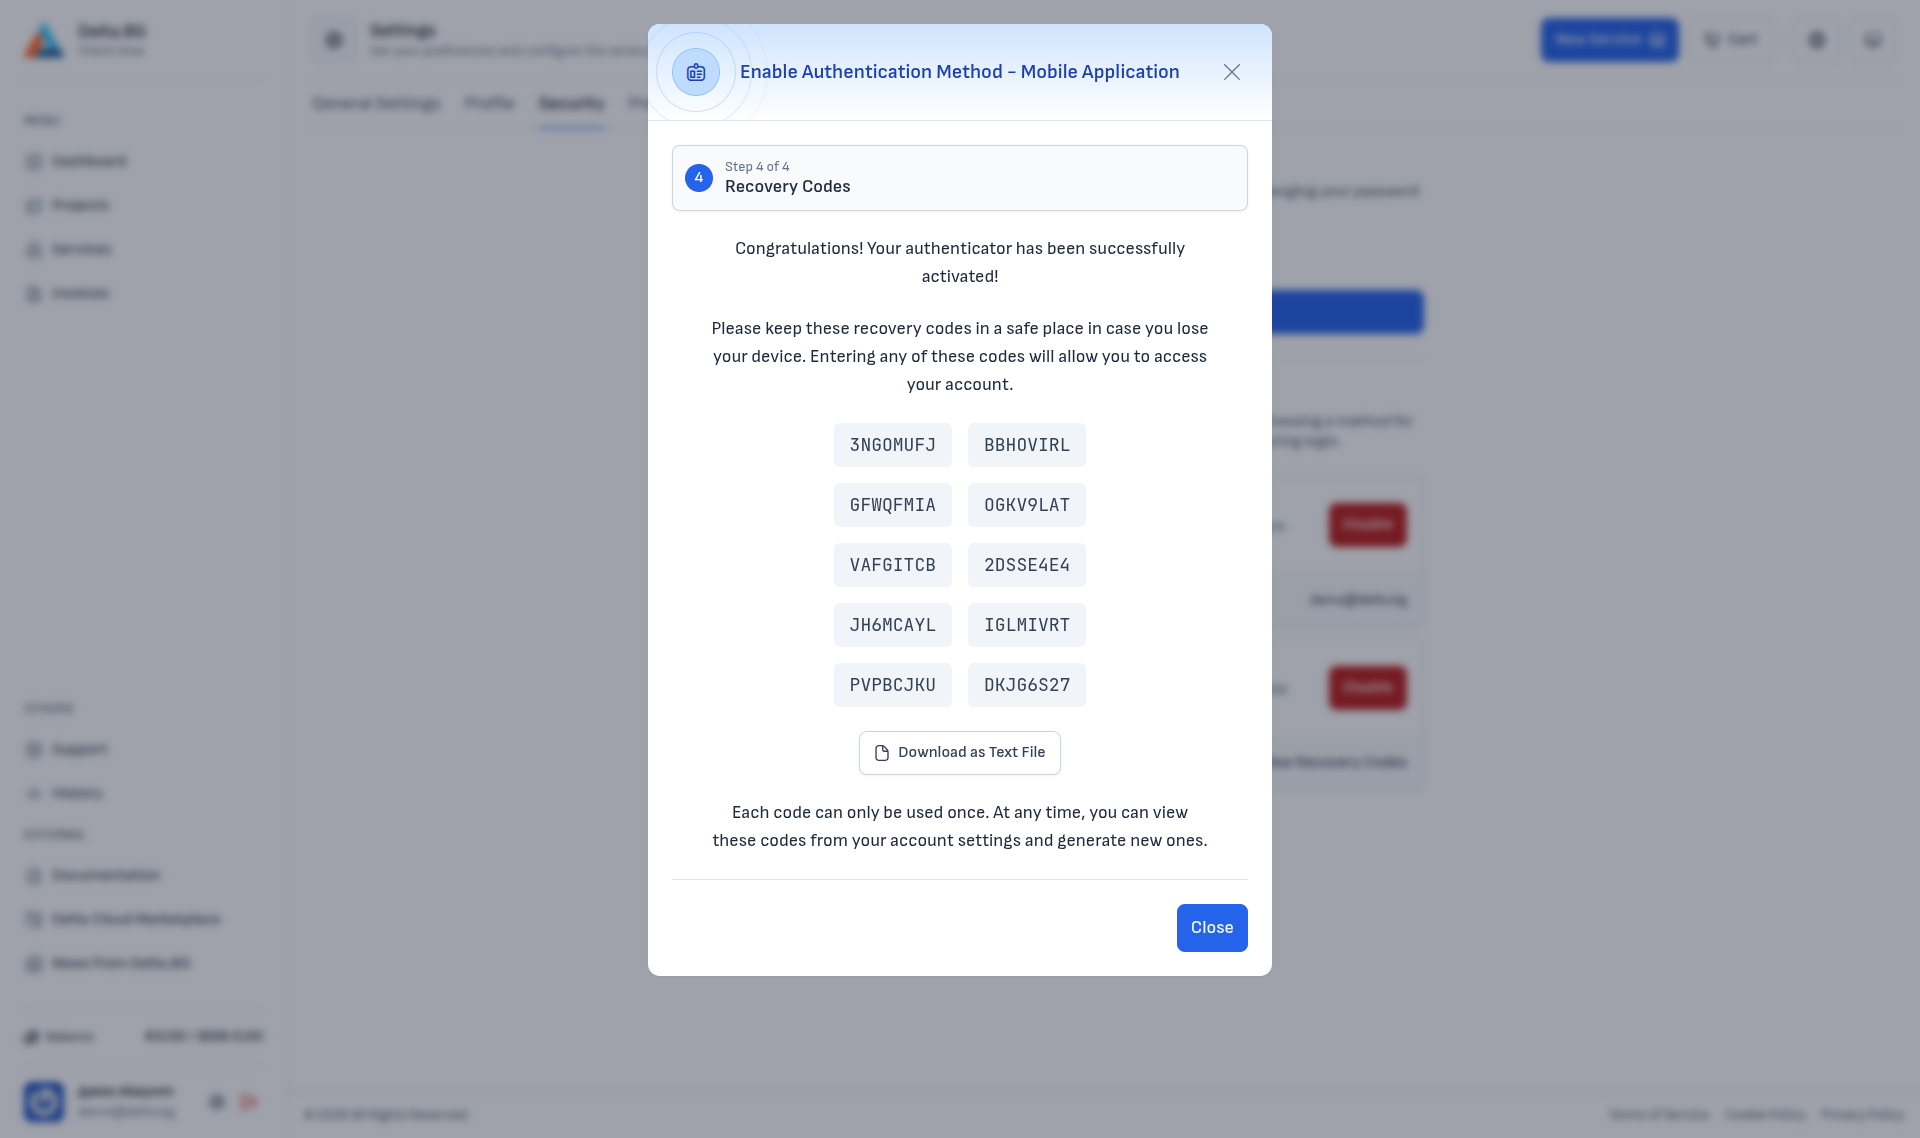
Warning
Save the recovery codes in a safe place immediately — the Download as Text File button saves them as a .txt file. Once the dialog is closed they are not shown again without a fresh authenticator code.
Reviewing and regenerating recovery codes
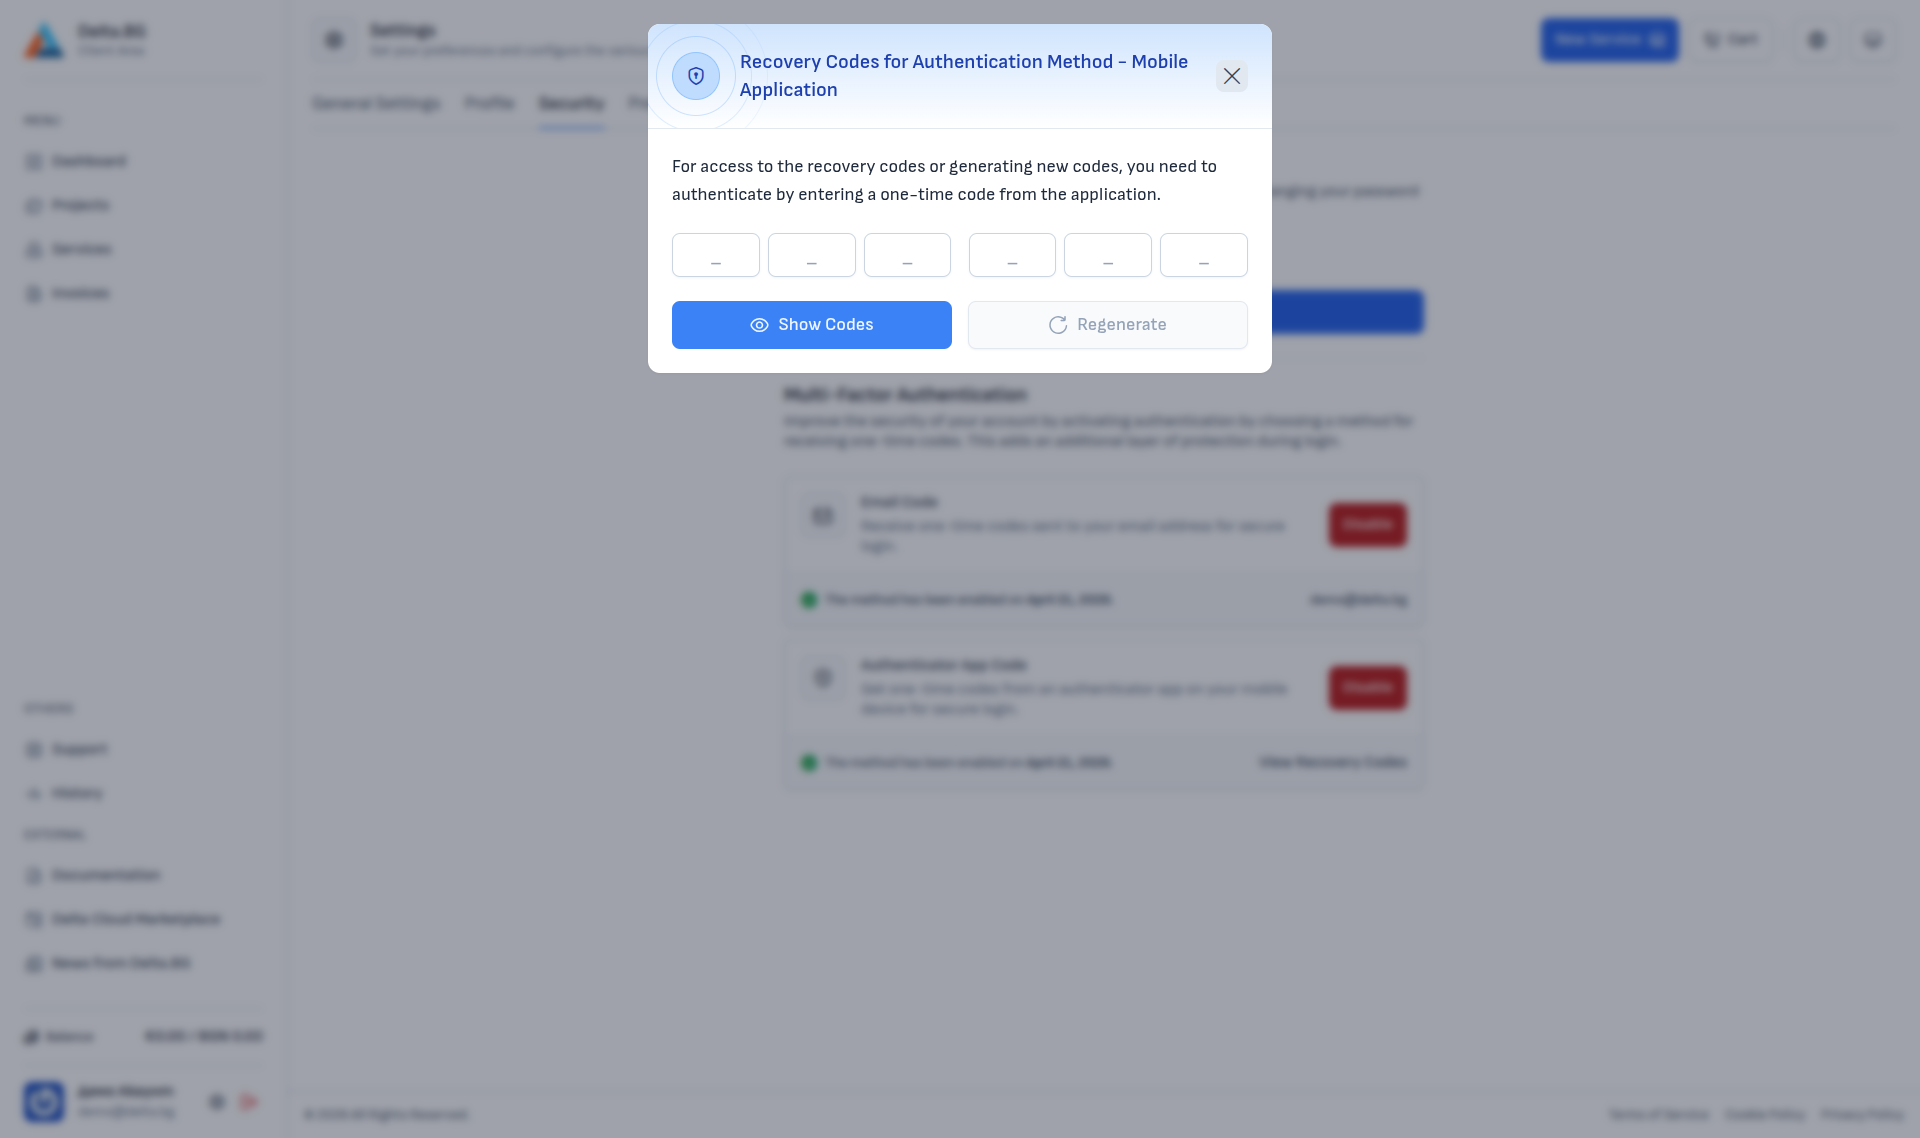
After activation you can review or regenerate the recovery codes from the Authenticator App Code block → View Recovery Codes link. The dialog first asks for a one-time code from the authenticator app:
After confirming, the currently valid codes are displayed:
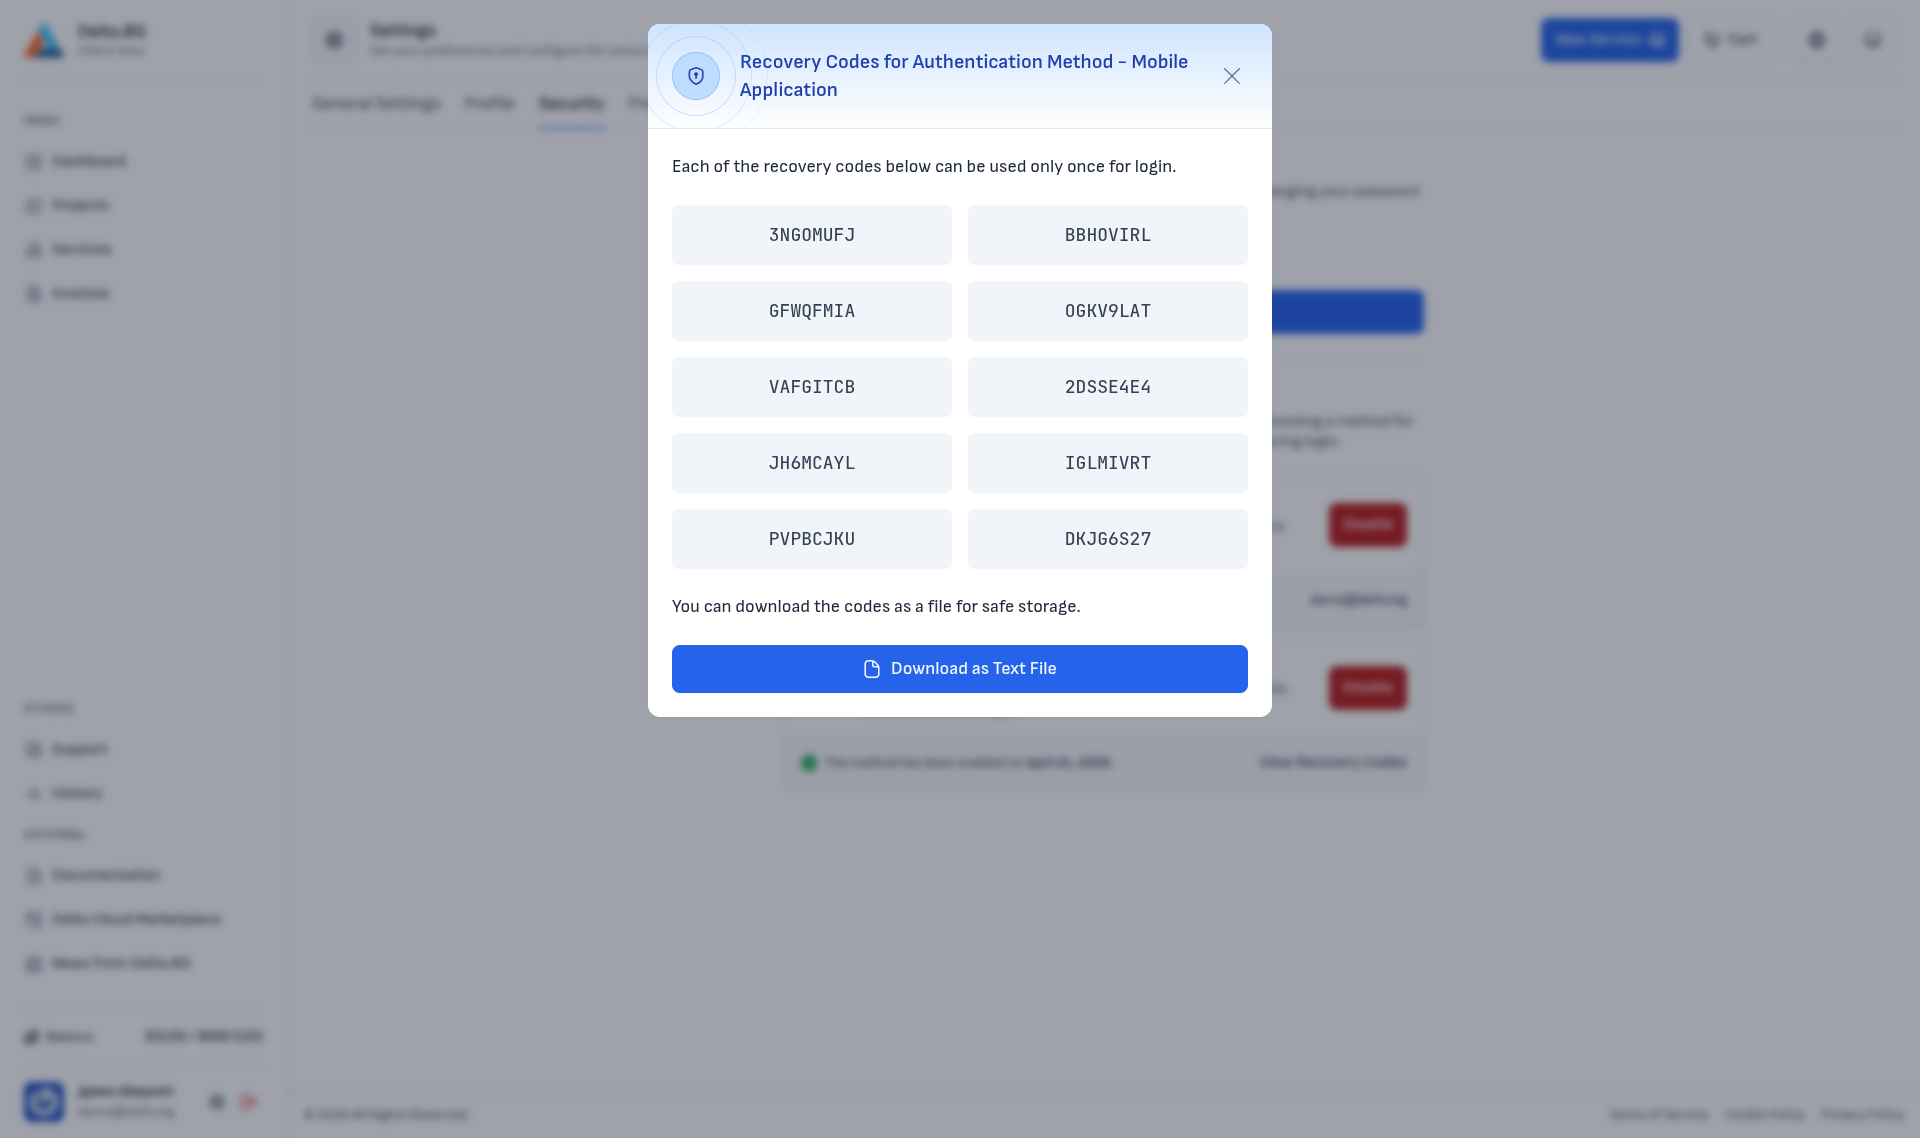
The Regenerate button invalidates all existing codes and issues a fresh set of 10.
Both methods enabled
With both methods enabled at once (email + app) the Security section looks like this:
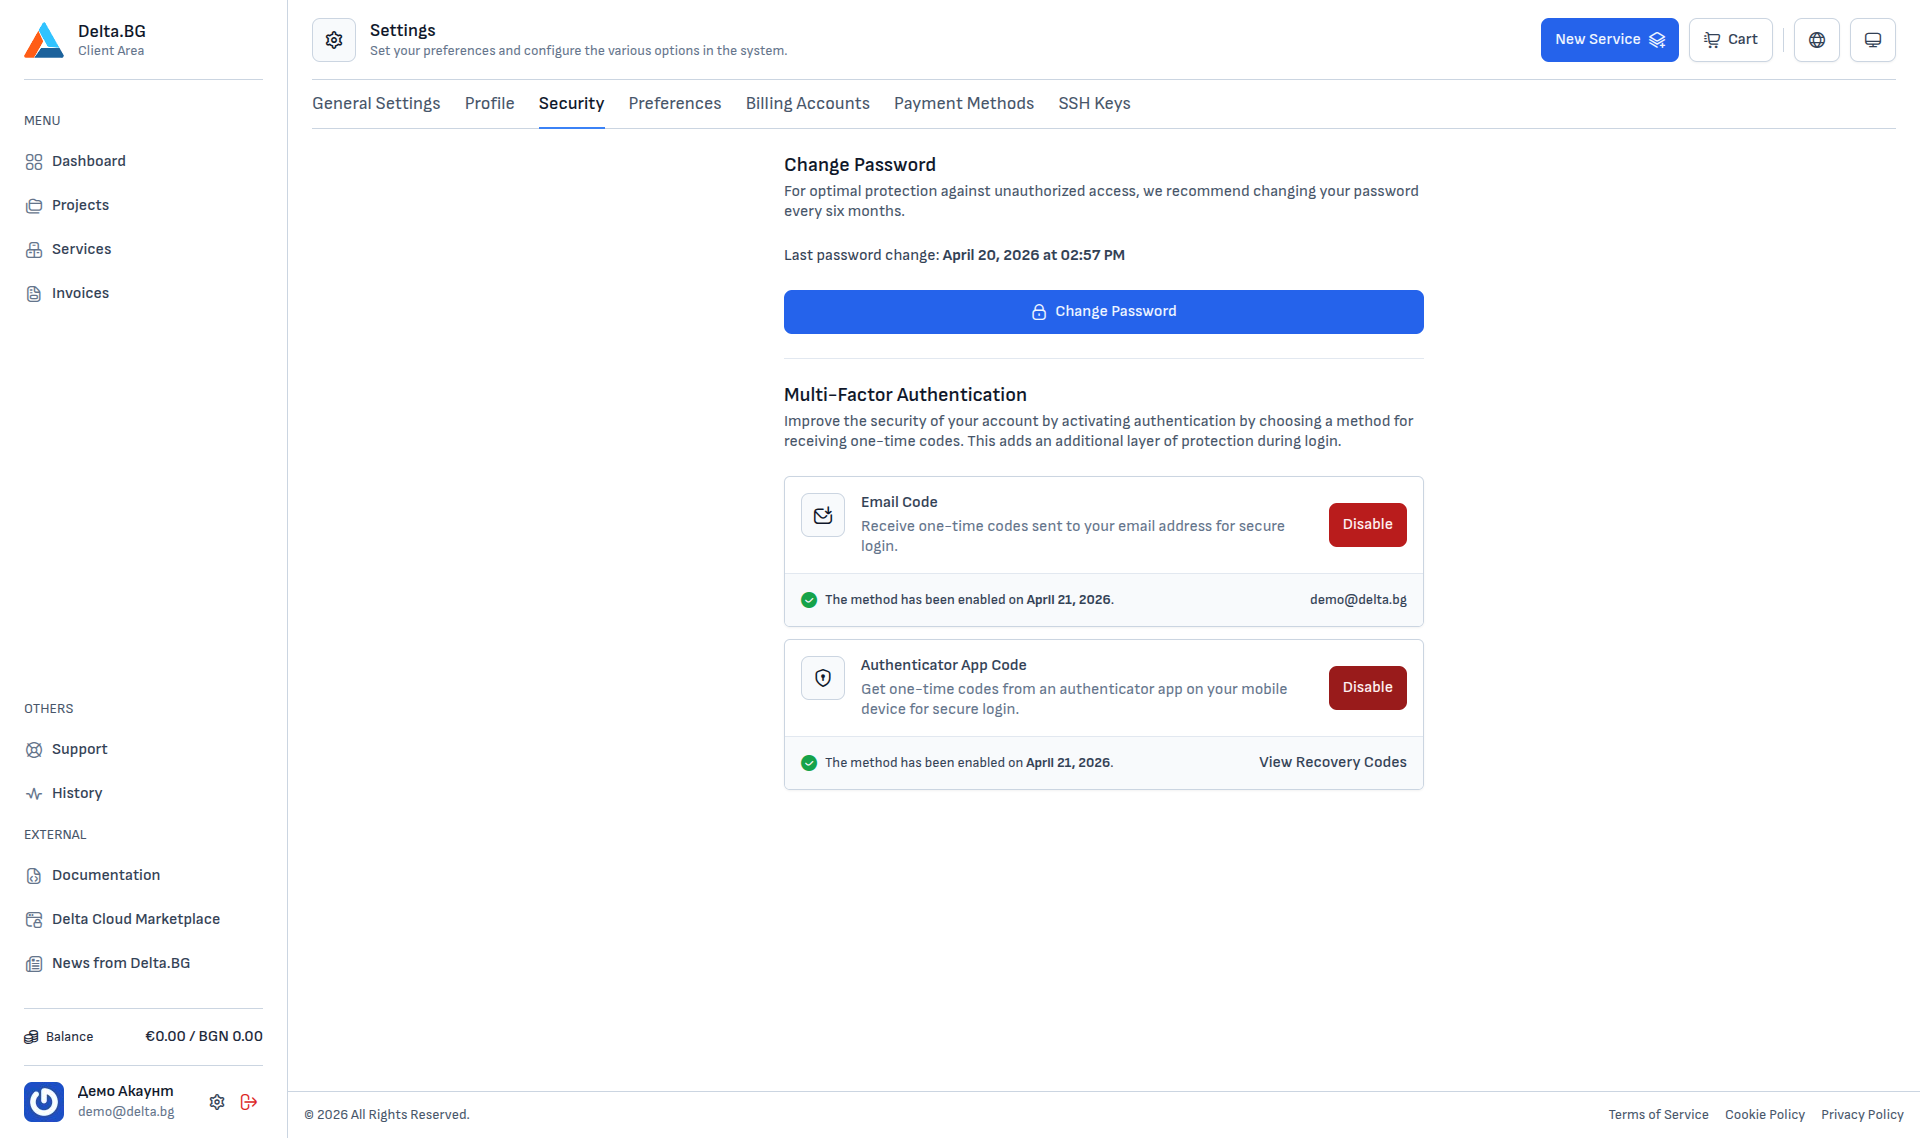
At sign-in the system asks for one code — from whichever method you pick on the sign-in page. Keeping more than one method active gives you a fallback if you lose access to the primary.
Disabling a method
Once enabled, the Enable button is replaced by a red Disable. Clicking it opens a dialog that requires a one-time code (sent automatically when the dialog opens for the email method, or taken from the authenticator app for the app method) to confirm the request:
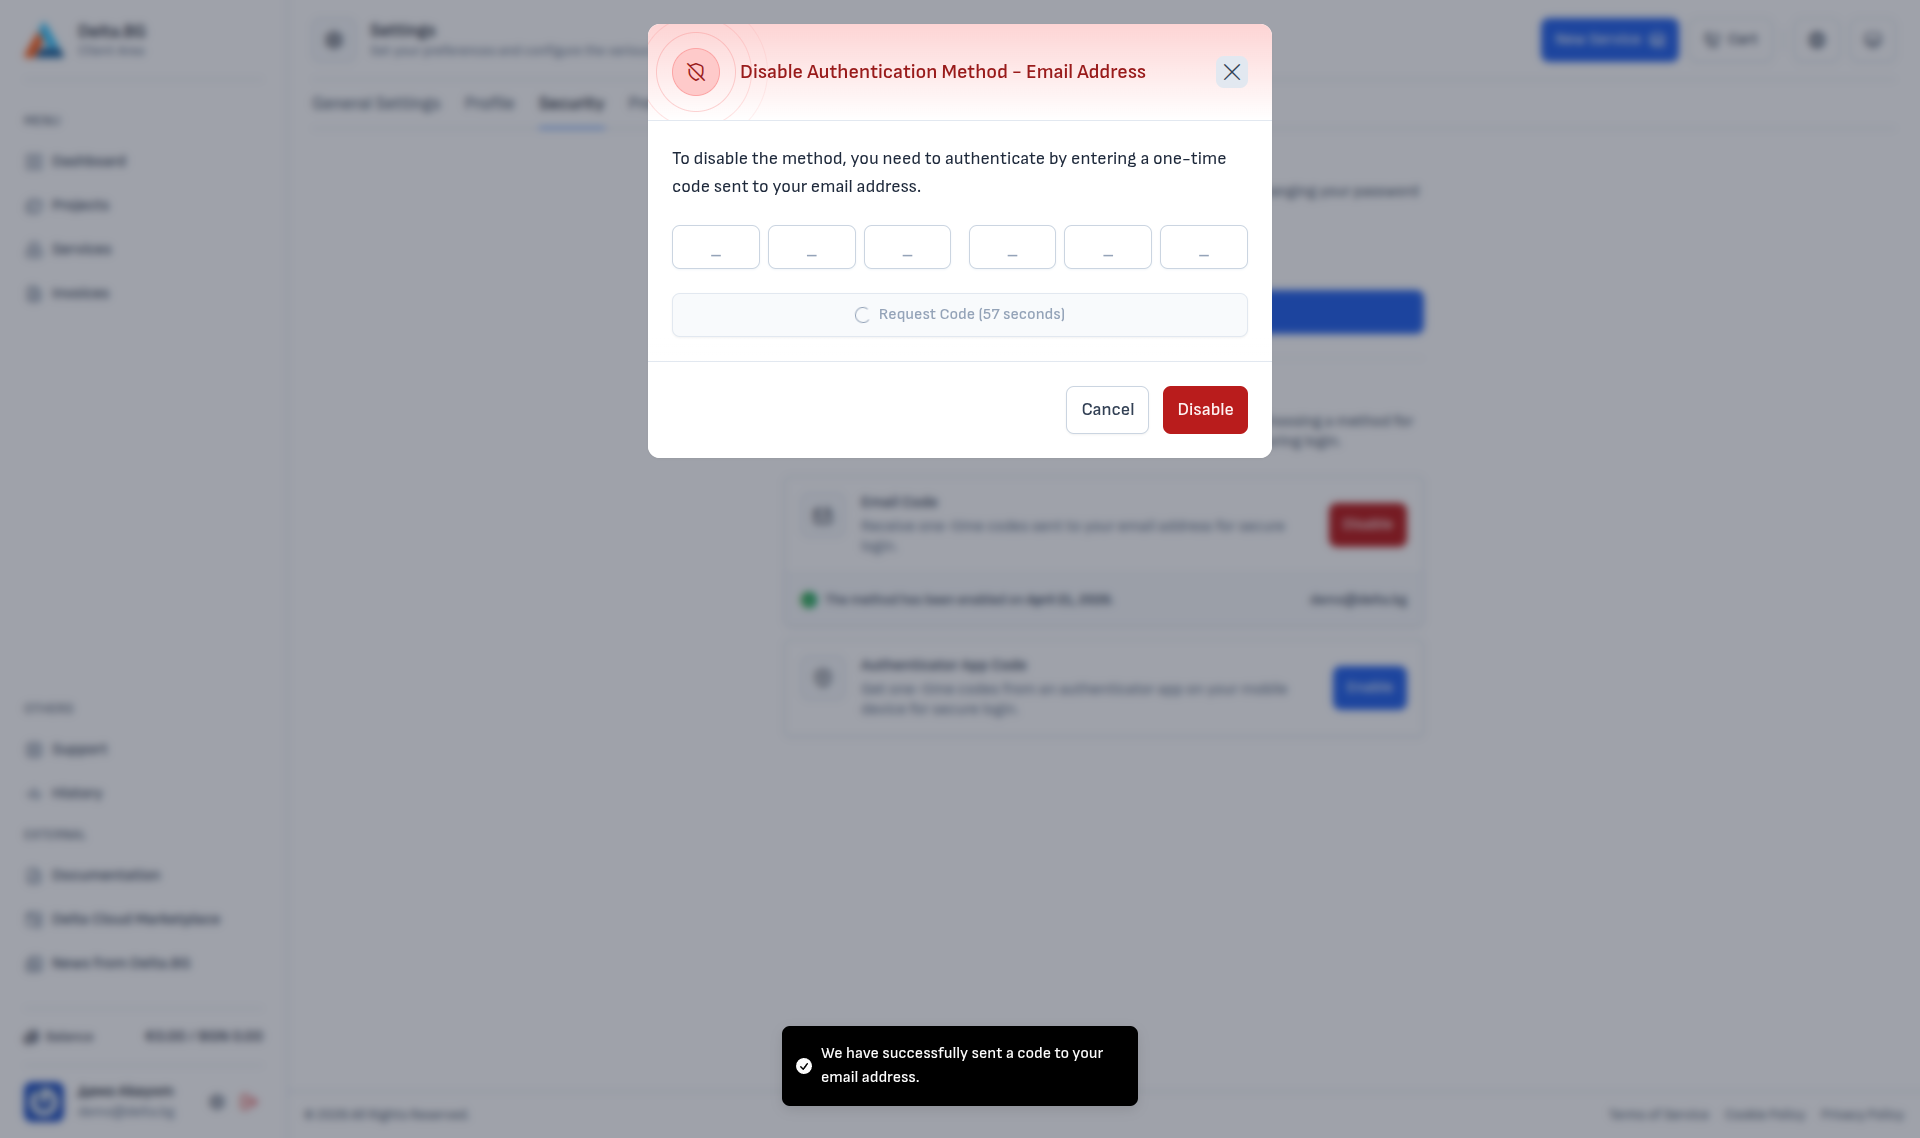
Enter the code and press Disable to turn the method off. Afterwards access to the account is still protected by the remaining active MFA methods — if you disable the last one, sign-in falls back to password only.
Warning
Disabling all MFA methods leaves the account protected by the password alone. We recommend keeping at least one method active.