Ordering and Activation
Service Overview and Configuration
In this section, we'll walk through how to configure the Bare Metal service from Delta.BG step by step, before adding it to the cart and completing the order.
Navigate to the available Bare Metal plans page from the client area or from the official page on Delta.BG. There you'll see a list of available physical configurations (e.g., "Intel Xeon 2 x Gold 6226"). Choose the plan that fits your needs, and you'll be redirected to an order finalization page.
Availability Status
Each plan in the list displays an availability status that indicates how quickly the service will be activated:
- Ready to Use — the server is in stock and preconfigured. Once the payment is confirmed, operating system installation starts automatically and takes at least 10 minutes.
- Available in 7-14 Business Days — the server has not yet been assembled or racked. After payment, it will be prepared within the indicated timeframe, followed by operating system installation.
- Product Out of Stock — the plan is currently unavailable. You can submit a request to the Sales department to be notified when it becomes available or to discuss alternatives.
Tip
If you need a server for immediate use, filter or focus on plans with the "Ready to Use" status.
Bare Metal Request for Out-of-Stock Servers
When you click on a plan with the "Product Out of Stock" status, a modal dialog opens that allows you to submit a request to the Sales department.
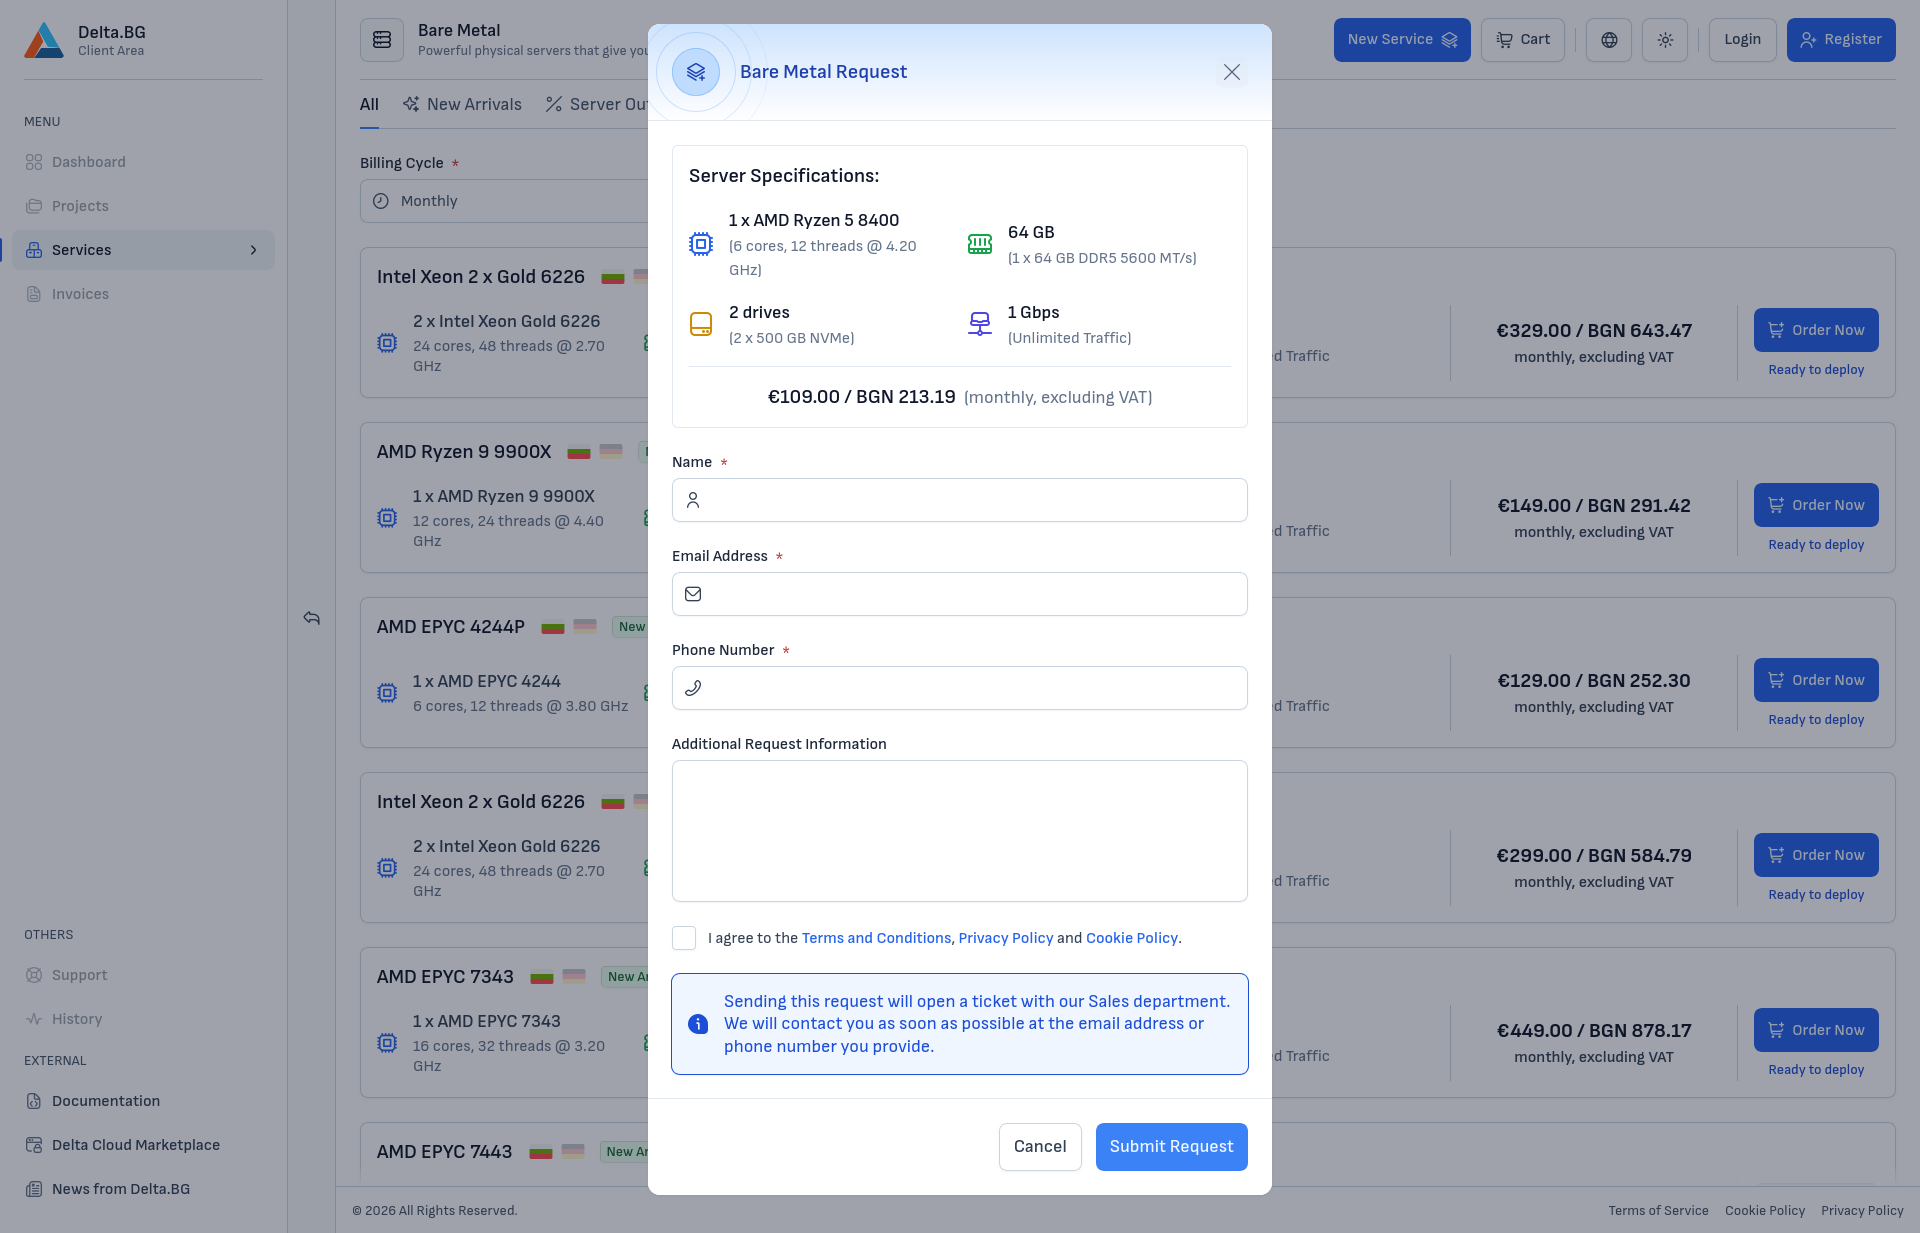
The modal shows:
- Server Specifications — the technical configuration (CPU, RAM, disks, network) and monthly price of the plan
- Request form with the following fields:
- Name — the contact person
- Email Address — for us to respond
- Phone Number — alternative means of contact
- Additional Request Information — free-form text for clarifications (e.g., desired timeline, expected load, specific requirements)
- Agreement with the Terms and Conditions, Privacy Policy, and Cookie Policy
After you submit the request, a ticket is created with the Sales department. A representative will contact you at the email address or phone number you provided to discuss the possible timelines and conditions under which the server can be provisioned, or to suggest an alternative configuration with similar specifications.
Project and Billing Information
At the top of the page, you'll see the "Project and Billing Information" section. The content of this section depends on whether you are logged in:
- For guests (unregistered users) — you'll see options to choose the person type (individual or legal entity), country, and currency for payment.
- For logged-in users — you'll see the option to select a project, from which the person type, country, and currency are automatically taken based on the billing information defined in the project.
Configuring the Service
On the left side of the page, you'll see the service configuration options.
Reviewing the Configuration
At the top of the page, you'll see the "Configuration" section with the technical specification of the selected plan:
- CPU — model, number of cores, number of threads, and base frequency
- RAM — total amount of memory
- Disks — number and size of the physical disks
- Network — network interface speed (e.g., 1 Gbps) and traffic policy (unmetered traffic — no data transfer charges)
This configuration is predetermined by the selected plan and cannot be changed on this page. If you want a different specification, go back and choose a different plan.
Unlike Cloud VPS, the configuration of a Bare Metal server cannot be changed after the service is activated, since it depends on the physical hardware. Consider your needs carefully before ordering.
Choosing a Region
Choose the region where your server will be located. The available region is eu-sof-1 — Sofia, Bulgaria 🇧🇬.
Region selection is final and cannot be changed after service activation, as the physical server resides in a specific data center.
Choosing an Operating System or Image
Choose your preferred operating system for the server. You can install:
- A clean Linux distribution — we offer all popular Linux variants;
- Windows — with an additional monthly license fee.
The operating system can also be changed after service activation via Reinstall.
Choosing a RAID Configuration
Choose a RAID scheme for the server's disks. The available options depend on the number and type of disks in the selected plan. For a plan with two disks, typical options are:
- RAID 1 (Recommended) — data is mirrored across two disks, providing protection against the failure of one disk without impacting performance.
- No RAID (Not recommended) — the operating system is installed on a single disk, without additional protection. If the disk fails, all data will be lost.
For plans with more disks, additional RAID levels (RAID 10, RAID 5, RAID 6) may be available. For more information about the differences between them, see the Glossary section.
Warning
The selected RAID configuration cannot be changed after service activation — it is applied in hardware when the server is initialized. Carefully consider whether you want data protection (RAID 1 and higher) or maximum capacity.
Service Label
The system offers an automatic label for the service, which you can change for easier identification. The label is visible in your list of services and can be changed at any time from the service page.
Configuring the Order
On the right side of the page, you'll see an order summary and additional settings:
Billing Cycle
Choose a billing cycle for the service. The available periods are 1 month and 12 months (the latter is more cost-effective as it offers a lower monthly price).
Order Summary
In the summary you'll see:
- Service — service features and base prices without VAT
- Taxable Amount — the amount on which VAT will be charged
- VAT (20%) — the tax that will be charged on the taxable amount
- Total Amount Due — the final price with VAT included
Adding to Cart and Reviewing the Order
After configuring all settings, click the "Add to Cart" button to proceed.
On the next screen, you'll see a summary of the services added to the cart and their final price. Carefully verify that all the settings you've chosen are correct by expanding the details of the corresponding service.
Mark your agreement to the terms and conditions and click the "Continue" button to proceed.
Completing the Order
After clicking the "Checkout" button in the cart, you'll be directed to a payment method selection page.
Choosing a Payment Method
Choose the payment method you want to use:
- Bank Transfer
- PayPal
- Stripe (card payment)
- EasyPay
- ePay.bg
Confirmation and Payment
After selecting a payment method, click the payment button at the bottom of the page.
Depending on the selected method, the process differs:
- PayPal, Stripe, or ePay.bg — you'll be redirected to the respective platform to complete the payment immediately. After successful payment, you'll see a confirmation screen.
- Bank Transfer or EasyPay — the order will be created and you'll see a confirmation screen. The service will be activated after your payment is received.
Service Activation
Activation of a Bare Metal server depends on the availability status of the selected plan:
- Ready to Use — once the payment is confirmed, operating system installation starts automatically. The process takes at least 10 minutes, depending on the selected OS.
- Available in 7-14 Business Days — includes physical hardware preparation (assembly, RAID configuration, rack mounting, connecting the network and power), followed by operating system installation.
- Product Out of Stock — the plan is unavailable; instead of placing a standard order, submit a request to the Sales department from the Bare Metal Request for Out-of-Stock Servers section.
Note
The time it takes to confirm the payment depends on the selected method — for card, PayPal, Stripe, and ePay.bg it is nearly instant, while for bank transfer and EasyPay it can take a few business days after the amount is received.
Once activation is complete, you will receive an email confirming that the server is installed and ready to use. The service will appear in your list of active services in the client area, from where you can start working with the server.